How to Layer Clothing (and Why You Should)

Woman zips rain jacket on Norweigan mountaintop.

If you’re working, exploring or playing outside, your clothing is arguably your most important equipment. If you layer your clothing correctly, it can keep you warm (or cool) and dry. Layering divides up your clothing so that you can add or remove as much as the weather calls for without your clothes getting too bulky or leaving you too exposed. Here’s our guide on how to layer!

Illustration explaining clothing laters.


Base Layer


This is your first layer of clothing, the items you wear directly against your skin. The base layer for cold weather conditions is typically tight against the skin. That way, it reflects more heat back to the body. Base layers for warm weather should be looser so that air can flow between the garment and your body, helping you cool down. Think thermal/long underwear, t-shirts, socks and gloves. What you’re looking for is something that will add a little warmth but also wick moisture away and dry quickly. You Couple hikes in rain gear.may feel fine when you’re doing some sort of exercise, but once you start cooling down, any moisture held against your skin is going to make you that much colder. Look for items made from polyester or Merino wool. We love Icebreaker’s iconic line of Merino wool base layers, including shirts, technical tops, and leggings.

Mid Layer


This next layer is generally responsible for insulation. It traps air warmed by your body when it escapes from the base layer. More than one mid layer can be worn at a time, depending on how cold you are. The mid layer should also be moisture-wicking and quick-drying. You don’t want moisture to get trapped between the base and mid layers. That’ll just weigh you down and feel uncomfortable. Ideally, you want a garment that isn’t too heavy or bulky, too, since you’ll have to carry it if you don’t wear it. Look for items made from polyester fleece or stuffed with either a down or synthetic fill.


Outer Layer (Shell)Hiker sits, writing, on mountaintop.

This layer goes on top of everything else and is responsible for keeping wind, rain and snow off of you. Because they are made to repel moisture and block winds, shell layers are typically not very breathable. That means that they’ll reduce the effectiveness of any wicking properties of other clothes you have on. Shells are divided into three different styles: hard, soft and insulated. One material that is particularly favored in this area is GORE-TEX. It tends to be one of the more breathable materials that still stops moisture and wind from reaching the body. Arc’teryx offers some GORE-TEX shells.


Using a combination of these three layers of clothing will allow you to prepare for both expected and unexpected weather without leaving you wishing you’d brought along that one thing you left behind.


Text by Bo King


Wanting to get out and explore? Find what you need for your next winter adventure here.

How to pick outdoor shoes; a two part guide.

How to pick outdoor shoes.

Part Two

Trail shoes versus hiking shoes. Light hiking boots versus trail-running shoes. Outdoor shoes are confusing sometimes. Use the guide below to learn more about each style and figure out what’s best for you.

Once you’ve determined all your feet’s needs using our guide, you can start looking at what kind of shoe you’d like. We’ve broken these different styles down below with some recommendations at the end. 

6 different styles of outdoor shoes

  • Hiking sandals:
    The hiking sandal is a lightweight sandal upper with a hiking-style sole. These are best for quick adventures where you want a versatile pair of day-hike shoes that can get wet.
  • Hiking shoes:
    The trail shoes are best for day-hikes and weekend adventures. The best hiking shoes have a technical upper and midsole without the ankle support of boots. These are a good option if you have ankle pain or don’t want something too warm. If you have problems with rolling ankles or stability issues though, a full boot may be better.
  • Hiking Boots:
    The boot is an above-the-ankle style hiking shoe with full control. These are a staple of hiking for a reason. The best hiking boots give you full control and ankle support and keep you comfortable mile after mile. While some dislike the extra weight and stifling warmth, boots are your best bet for support.
  • Trail-running shoes:
    The trail-running shoe is an upgraded version of the running shoe. Trail-runners take the core of a running shoe and add a grippier outsole, sturdier midsole, and a water-resistant upper. As a result, they’re durable shoes that take on anything. The advantage to trail runners is their breathability and comfort. They can, however, wear down easier and don’t offer the exact support you need for walking.
  • Light-hikers:
    Light-hiker is a term for hiking boots/shoes made with lightweight, synthetic materials. They’re breathable, lightweight alternatives to old-school boots. If you prefer a breathable shoe with less support and comfort than traditional boots, consider a light-hiker. They are best for shorter trips and hotter environments.
  • Approach shoe:
    An approach shoe is a combination of climbing and hiking shoes. Approach shoes are designed for hiking, “scrambling”, and light climbing. Approach shoes handle day-hiking well but are specifically made for climbing.

Now that you’re familiar with these styles, check out some of our suggestions. There are plenty of shoes and boots that fit each need, but we’ve shared our favorites to help you pick. If you’re still on the fence, stop by one of our stores or reach out online via email or on the phone!


For injury prevention: 

The full-height boot is best to accommodate ankle and foot problems. While you sacrifice some breathability, extra support and control are essential to keep you safe. You can also look at dedicated hiking shoes if you prefer. A shoe is a better option than a boot if you struggle with ankle/calf swelling or hot spots. 

  • Our favorite:

    Keen Targhee II Mid Hiking Boots – These are mid hiking boots with a mesh and nubuck leather upper. The removable metatomical dual-density EVA footbed is perfect for flat feet.

For warmer weather: 

Try a light-hiking option or a non-waterproof trail running shoe. Oftentimes, these stripped-down shoes are the most breathable and still provide support. For day hikes on maintained paths, you don’t always need the extra weather resistance. High-quality wool hiking socks are often all you need.

  • Our favorite:

    Altra Men’s Lone Peak 6 Trail-Running Shoes – These low-top running shoes are great for wider feet with unrivaled trail support. Thanks to the aggressive tread and the breathable mesh upper, they’re a great choice for hot hikes.

For mixed-use: 

If you don’t want a dedicated pair of trail shoes and only need a supportive option for short hikes, try a more dedicated running shoe. Running shoes provide all the support of a trail shoe in a lighter package. And while they aren’t made for serious terrain, they’re still great on maintained trails. Plus, you can go from the gym straight to the trailhead!

  • Our favorite:

    Hoka Men’s Clifton 8 Running Shoes – These versatile running shoes feature a plush midsole with a breathable upper. For short trips on well-maintained trails, they’re supportive and comfortable enough.

For your first real pair of hikers: 

When you’re ready to upgrade from your starter boots, check out a mesh option. These padded yet breathable uppers are perfect for long thru-hikes. They’re versatile enough for three-season use.

  • Our favorite:

    Salomon Men’s X Ultra 3 Mid GTX Hiking Shoes – These trail-running inspired boots are perfect for hiking. The rugged Missiongrip outsole and tech lacing upper have unlimited grip. The breathable upper makes a world of difference in sweltering heat.

For versatile trail-use:

If you want trail-running performance that can still tackle day hikes, check out trail-running shoes from On, The North Face, and Salomon. These are great for maintained trails.

  • Our favorite:

    On Men’s Cloudvista Trail-Running Shoes – These trail-running shoes combine a light mesh upper with a Missiongrip outsole. Their breathable design is perfect for hot trails while the DWR coating keeps out moisture. Go as fast or as slow as you want with superior control and light, breathable design.

For a spare pair of trail shoes:

Check out some hiking sandals. They’re great as camp shoes. Since they strap onto the side of your pack, won’t hold water, and can make runs to the camp store, they’re all you need. If you’re car camping and don’t want heavy-duty boots, a pair of hiking sandals are a great alternative. And if you’re around water, having a pair of sandals with a toecap is great for exploring waterways safely.

  • Our favorite:

    Chaco Sandals – Try a pair of Chacos for versatile trail needs. From camp shoes to beach sandals, they do anything and everything comfortably.


So whether you’re heading out for a day-hike or hitting the trails for a while, step in confidence.


Wanting to get out and explore? Find what you need for your next adventure and explore the fresh. We want everyone to enjoy the outdoors, and we work to build loyalty one connection at a time. Visit one of our stores or take advantage of our shipping or curbside pickup! #BeOutdoors

What makes an outdoor shoe?

A two-part guide on how to pick outdoor shoes.

Part One

When looking for new shoes, there are a lot of factors to consider. Outdoor shoes are easy to pick with this guide. And there’s a simple process to finding the best pair of hiking shoes. So follow along and use this guide to ensure you get the right pair of hiking shoes to enjoy your time outdoors.

To figure out what shoes are best for you, start by understanding your feet’s needs. This process is simple. First, you need to figure out your shoe size. It varies based on the manufacturer and the style. Check out some size guides from our top brands like On, Hoka, and Altra. The easiest way to get your shoe size is to stop by one of our store locations. There, you can get your size taken using a Brannock Device. This measures the length and width of your foot and identifies flat feet or arch problems. You can also measure your foot size at home following these simple steps.

The next piece is understanding your foot’s needs. Feet are a complex body part and shoes can make or break your time outdoors. We’ve broken down some basic considerations below and what factors to consider with each shoe component when shopping for your next pair of shoes. 

Pronation vs supination

  • Pronation is the natural motion as your foot rolls from heel to toe while running or walking. While it is often seen as a bad thing, it’s normal for your foot to pronate a little bit. Overpronation is the real problem. Overpronation occurs when your foot overcorrects for this rolling motion and flattens your arch. This puts too much pressure on your arch, heel, and toes leading to issues with your foot and ankle. Overpronation is best solved with supportive and cushioned shoes. Some of the best options for overpronators are Hoka, Keen, and Altra.
  • Supination is the opposite of pronation. Supination occurs when your foot rolls too far outward. This causes extra pressure on your heel, toes, and ankles. It’s especially dangerous as your body distributes too much weight over the thinnest part of your foot. Supination is best treated with supportive shoes, like Overpronation. Check out support options from Keen, Salomon, and On.


Stability vs neutral

Shoes are often classified as either stable or neutral.

  • Stability shoes include extra support on the inside of the shoe to accommodate overpronation.
  • A neutral shoe is more balanced and features an even amount of support spread over the entire sole. Thanks to the more firm foam, neutral shoes are often better for those who want a fast and light option.


Always try on to find your perfect fit by following these steps:

  • First, shop for shoes when it’s warmer out and at the end of the day. That way you can account for foot-swelling and get the best size. This also lets you test how breathable the shoe is.
  • Next, when you put them on but before you lace them up, knock the heel against a surface to set your foot as far back in the shoe as possible. 
  • Then, lace them up. When lacing boots, be sure to avoid over-tightening them on hot spots. If your toes are in pain after a hike, try a looser lacing around the toebox. If you often feel numbness in your feet, try a lacing pattern that doesn’t cross over the top of your foot. 
  • Finally, walk in them a lot. Walk on inclines and loose surfaces if possible, and up and down a hill. 


If you aren’t able to shop for shoes in person, try getting something from a brand you’ve worn before. Shoe manufacturers use the same “last”, the wooden foot model that the shoe is constructed on. That lets you order with more confidence since you’re used to the fit.


When you start shopping for shoes you may find a lot of confusing information. Shoes are simple. The average pair of outdoor or trail running shoes feature these key parts:

Upper 

The upper of a shoe is key to preventing pain and maximizing comfort. With a padded mesh construction, most outdoor shoes lock onto your foot from the heel. This keeps the midsole in place while ensuring your feet can wick moisture.

Key terms:

  • One-piece liner:
    A liner is a part of the shoe that lines the inside so the shoe fits your foot as one piece.
  • Collar:
    A shoe collar is a rigid piece at the top of the heel and around the top of the laces. The collar ensures the shoe holds its shape after you tie the laces. It also makes the shoe easy to put on. Some collars are a flexible knit material, while others are rigid foam blends.
  • Toe box:
    The toe box is the upper section where your toes sit. Often, the toe box is the first part of your shoe to wear out due to constant friction from your pinky and big toes. Shoes with a wider toe box, such as Altra’s, will help if you have this issue.
  • Upper:
    An upper features a combination of polyester mesh and other materials to create a padded, breathable structure. Mesh is preferable for day hiking and running thanks to its breathability and comparable support. 
  • Heel cup:
    The heel cup is the back part of the midsole. It’s a critical part of the shoe. The heel cup keeps your shoe from slipping down at the back and maintains the structure of the shoe as you walk. Heel cups use a firm plastic that curves around the back of your foot to provide rigidity. The most important factor with heel cups is to ensure your shoes fit and feel good on long hikes.

Waterproofing

Waterproof hiking boots come in three main options. These include waterproof membranes, a chemical treatment, or a water-resistant shell. These range from how water-resistant they are and how breathable they are. The more breathable a waterproof treatment is, the less waterproof it usually is. We’ve summarized these options below. Check out the descriptions below to ensure you pick the best waterproofing option for you!

  • DWR:
    Durable water-resistant chemical treatment is the standard waterproofing option. DWR is a moisture-wicking chemical layer that coats porous fibers. This prevents them from absorbing water but is small enough to not block airflow. Oftentimes a DWR isn’t considered a “fully waterproof” option since you can’t submerge the boots. The DWR option is great for day hiking shoes that might only handle a bit of ambient moisture from mud and rain.
  • Waterproof membrane:
    A membrane is overlapping layers of mesh and polyester. The top layer is often a waterproof layer with tiny holes, smaller than a water molecule, that let the shoe breathe. The inner layers provide a cushion and space for moisture to flow off your skin. The membrane is best for thru-hiking and camping on the trail, as the waterproofing keeps your feet dry. This option isn’t as breathable, so get moisture-wicking hiking socks like Smartwool or Swiftwick. Most use either Gore-Tex or their own
  • Water-proof shell:
    A shell is the most water-proof option. A shell is a fully waterproof outer without a “membrane”. Shell options are made for technical needs like mountaineering or similar terrains. A shell option is best for navigating snow. There are some hybrid shell options, like Sorel Duck Boot. These have a breathable leather upper with a full rubber toe cap and outer. 


Midsole

The midsole of your shoe creates stability and support. Modern shoes utilize a blend of plush EVA foam with a sturdy TPU foam inside for support and structure. 

Key terms:

  • EVA Midsole
    EVA is a type of foam found in shoes. These midsoles are popular thanks to their responsive and comfortable foot feel. It’s also very durable and maintains its support for a long time. It’s rare to find outdoors shoes made without EVA foam, but pay attention to a “TPU” foam as well. TPU is a denser foam that provides more support for more technical options. TPU is often found in approach shoes, mountaineering boots, and trail runners.
  • Stack Height
    The stack height is the height of the actual sole, from the bottom to the insole where your foot sits in the shoe. This measurement lets you know how bulky the outsole is.
  • Shank:
    A shank is a rigid piece of plastic that runs the length of the outsole. It provides structure and keeps the shoe rigid through the stepping motion. Then, the shank flexes and provides the “bounce” as you roll your foot forward.


Outsole

The outsole provides the necessary grip and structure to move you forward. Some shoes use a proprietary outsole called Missiongrip™. Missiongrip™ features a special diamond shape and rubber compound. When looking for trail shoes, the sole only makes a difference if you’re running versus hiking. Trail-running shoes need an aggressive tread, with deep, grippy channels and lugs. Hiking shoes need a wider, stable forefoot with grippy heels.

Key terms:

  • Drop:
    A shoe’s drop is the distance from the highest part of the outsole down to the lowest part. It measures how much curve there is in the shoe’s sole. This helps you figure out if the shoe is a good fit for your foot. While the average shoe has a 6mm drop, like Hoka or On, some have an 8-10mm drop like The North Face. Other brands like Altra are famous for having a 0mm drop and can be a good option for flat-footed hikers.
  • Missiongrip™/rubberized outsole:
    Some shoes use a proprietary rubber blend for their outsoles. The Missiongrip™ outsole technology from On Running specifically use a diamond-shaped tread with a super-sticky rubber for long-lasting performance. Other outsoles use specially formulated rubber to maintain grip.


Now that you’re familiar with the components of outdoors shoes, you can shop with confidence. Check out part two of our outdoor footwear guide, launching Thursday April 21, 2022, for an explanation of different outdoor shoe styles and which one is best for you!


Wanting to get out and explore? Find what you need for your next adventure and explore the fresh. We want everyone to enjoy the outdoors, and we work to build loyalty one connection at a time. Visit one of our stores or take advantage of our shipping or curbside pickup! #BeOutdoors

7 Underrated Ways to Leave No Trace in the Outdoors

Everyone knows about packing out your trash, or what to do when nature calls in the wilderness. These are number one and number two (literally) in the leave-no-trace playbook for those of us who care about preserving outdoor spaces for future generations to enjoy.

Well, okay, apparently not everyone knows. We see trash (and pick it up) all the time, just like you do. We’re as baffled as you are when we see some yahoo flick a cigarette butt out the window of their car. Do some people simply not care? Further education is clearly needed.

For those of us in the know, though, minimizing our own impact goes beyond these two obvious line items. If you’re already doing the easy stuff, here are a few often-overlooked ways to tread lightly in the great outdoors.

1. Travel on durable surfaces.

6rNPvOme0o2MKS6WOkaCMy
Hiking the Ice Lakes Trail in Colorado’s San Juan National Forest. Paxson Woelber

This one should be easy: walk on the trail. Don’t cut switchbacks, which creates both erosion problems and ugly “social” trails. If you have to go off-trail, tread carefully; avoid fragile alpine flora or cryptobiotic desert soil. Of course, we all see evidence that many outdoor users aren’t doing this. We see all those social trails near lakes and campsites, and trampled vegetation near crags and scenic overlooks.

For all trail traffic, including mountain bikers: think about durable surfaces, and whether your boots or bike tires are leaving a discernible mark on the terrain. If you’re leaving ruts because of wet or freeze-thaw conditions, ride somewhere else; no matter how many slow-motion edits online seem to imply otherwise, it’s not okay to skid your tires and sling “brown pow” or pioneer off-trail alternate lines.

This goes for photographers, too, despite the temptation to stomp off-trail to that perfect vantage point. Sure, the adage may say: “Take nothing but photographs, leave nothing but footprints.” The photos are fine… but why leave footprints where you don’t have to?

2. Park your car on durable surfaces, too.

1HrW9fWpZCsMqSKQ64Y2sM
Parking at a snowy campground in Glacier National Park. D.Taylor in Idaho

What do you do when you arrive at a trailhead, and the parking lot is full? Do you just pull off the road wherever it’s convenient? In some environments this may be acceptable, but in many it’s not. If simply walking on cryptobiotic soil or alpine meadows has a negative impact on those surfaces, imagine what parking your 4Runner on them does. Additionally, if that parking lot is in a neighborhood, imagine how thrilled the neighbors will be if you’re parking on their lawn.

I’ve seen more than a few parking lots in National Parks absolutely overrun with cars parked all over sensitive terrain and their inhabitants absolutely trampling that terrain on the way in and out of those cars. We don’t think the answer is more parking and bigger parking lots, especially when the mission of the National Park Service is to protect and preserve these beautiful places; we think preservation includes an awareness of where you pilot your vehicle in the first place.

3. Respect permit limits, closures, and quotas.

4PPWO0766QkCuE8asGSUAs
View of Yosemite Falls from Glacier Point, Yosemite National Park. Mitchel

Speaking of full parking lots, some areas have chosen to counteract overuse by instituting lotteries, permit systems, and daily quotas. Sometimes that parking lot is full because, frankly, that’s how many visitors per day are a sustainable number without degrading the resource. Sometimes, areas are temporarily (or permanently) closed so they have a chance to recover. Some places, as we’ve noted in the past, are being loved to death.

We know it sucks when you arrive at the start of your day’s objective and it’s closed, or when you don’t win the lottery for that bucket-list trip, but the outdoors isn’t yours alone. We’re in this together, and we need to work together to protect the wild places we love. There are plenty of incredible places out there; be flexible with your plan, have a backup, and don’t fall into the trap of thinking that the only places worth visiting are on “10 best” lists and inside National Parks.

4. Avoid creating new campsites.

27nNxIBO7Wm8SMKOK6SGOq
Campsite on rocky cliff. ih

Well, aren’t we a buzzkill! While social media can seem like a competition to see who can pitch their tent in the most ridiculous place (we love @youdidnotsleepthere), existing campsites are usually there for a reason. Limiting the number of sites at a given location helps limit human impact to those designated places. If there are two camp spots at your favorite backcountry overlook, and you create a third, you’ve increased the visible impact by fifty percent!

You might be disappointed that the designated sites at that pristine alpine lake are two hundred feet from the water instead of two feet, but there’s a reason for it. You don’t have the right to overrule the land manager by making a new one! It’s easy to convince yourself “if I just put my tent here for this one night, I’m not really creating a campsite,” but you’ll leave signs of your visit; the visitor after you is likely to repeat your indiscretion, and the visitor after that, and what’s done cannot be undone.

5. Don’t build fire rings, and consider skipping the campfire entirely.

2LtxONTZvGSuCuUYgg8OG4
Utah camping without a fire. Zach Dischner

Look, we know that your Instagram shots are soooo much cooler with the glow of a campfire, and we all know a boutique, hand-painted hatchet is the ultimate accessory for the modern lumbersexual. We’ve also seen campsites surrounded by stumps where small trees used to be, the surviving tree stripped of every branch within arm’s reach.

It should go without saying that you should definitely skip the campfire if your region is experiencing a drought, you should respect any and all burn bans in place and, if you absolutely must have a fire, you must also make certain it’s completely out before moving camp. It almost sounds silly to type out, but every year major wildfires are started by careless campfire management. Roasting marshmallows over a canister stove may not be as sexy, but it’s also less likely to incinerate your favorite wilderness.

We recently published an article about campfire safety, but there are also some excellent articles about whether campfires are necessary at all (we recommendthis one). Think about it. Do you really need to have one?

6. Wash your gear, wash your kayak, and don’t transport firewood.

wsITAeBQmy02EGu8c624e
Packraft on the Anaktuvuk River, Alaska. Paxson Woelber

It’s important to understand that our impact on outdoor environments goes beyond what we can see, and beyond what is immediately apparent. A variety of pests and invasives—the hemlock woolly adelgid, the emerald ash borer, zebra mussels, water hyacinth—can be transported from watershed to watershed, and from forest to forest, sometimes with heartbreaking results.

We’re slowly watching our Eastern Hemlock trees die off, one by one, as the Adelgid spreads throughout the Appalachians. These ghost trees are solemn reminders that, sometimes, we leave behind more than footprints if we’re not careful.

You’ve probably seen signs at campsite kiosks and ranger stations instructing visitors to avoid transporting firewood and so forth. Not only should we be following these rules, we should make sure our fellow outdoor enthusiasts are aware of them, too.

7. No dams… and, seriously, stop stacking rocks!

2a4SGdZvdS0oCCie6auQwQ
Rock piles creekside along Middle Fork Trail, Washington. +Russ

Rock-stacking has become a major trend, and it absolutely has to stop. Cairns to mark a trail are fine, and are sometimes necessary, but we’re not talking about cairns. We’re talking about the bizarre proliferation of stacked rocks in certain parts of the world. No, you’re not enhancing the beauty of the natural environment. No, the wilderness doesn’t need improvement, especially if you consider ubiquitous signs of human meddling to be an improvement. It’s more of an eyesore.

As for dams, we see lots of river rocks being moved to create swimming holes, capture hot springs, and the like. This has a real impact on certain types of aquatic creatures, specifically the extremely interesting (and highly endangered) hellbender. Seriously, just leave the rocks where they are, and enjoy nature as it is. Scree slopes and rocky creek beds are not your personal Lego set.

Last Word

We’re not going to tell you exactly how to enjoy the outdoors; maybe you like to listen to Swedish death metal on your trail run; maybe you like to yell “wooo” at the end of a long downhill on your mountain bike, and more power to you on both counts.

Outside activity does, however, require an awareness of the world around you, and of the impact your visit has on it. We think that awareness should go beyond just burying toilet paper and carrying out your Snickers wrappers, and we hope you agree.

*We highly recommend some level of Leave No Trace training, not only for those new to the outdoors but for experienced outdoor enthusiasts. Learn more about Leave No Trace here. *


Wanting to get out and explore? Find what you need for your next adventure and explore the fresh. We want everyone to enjoy the outdoors, and we work to build loyalty one connection at a time. Visit one of our stores or take advantage of our shipping or curbside pickup! #BeOutdoors


Written by Jeff Bartlett for RootsRated in partnership with BCBS of Tennessee and legally licensed through the Matcha publisher network. Please direct all licensing questions to legal@getmatcha.com.

Featured image provided by Jeff Bartlett

How to Spring Clean Your Outdoor Gear

20170518_Spring Cleaning_Tent_Camping

It’s important to clean and repair your gear before using it on an adventure.

Spring adventures are right around the corner and chances are your outdoor gear is stuffed in a closet from your last Winter trip. It’s time to make sure your gear is in tip top shape for your next trip!

After getting home from spending time in the great outdoors, whether it’s a day hike or weeklong camping trip, the last thing anyone feels like doing is cleaning their gear. All too often, exhaustion and procrastination win out, and people tend to stuff their dirty, grimy gear in the far corner of a garage only to discover that, come spring, their tent or backpack has become a Petri dish of nasty stuff. To make matters worse, people often store gear in places where heat and humidity, rodents, and cold temperatures can degrade or even destroy fabrics, stitching, glue, and other components.

If that scenario sounds familiar, fear not: With a little know-how and elbow grease, you can save your trusty tent and hiking boots from a similar fate. Here’s what to know about spring cleaning your outdoor gear, plus insider tips on how to give your backpacks, tents, sleeping bags, and footwear a little TLC before you hit the trail this season.

Backpack Care

Cleaning

So, your backpack smells like a locker room trash can. The odor is likely due to sweat, dirt, and that food bag you forgot to empty—all of which not only stink, but can shorten the life of your pack. Another damaging element? Salt from sweat, which can corrode the metal in zippers and breaks down nylon fabrics.

But cleaning your backpack involves a bit more than just tossing it into the washing machine. In fact, don’t even think about doing that: The agitation from a machine can break down fabrics as well as foam in hip belts, shoulder straps, and back panels. Also, straps can get twisted in the components of a top-loading washer.

Instead, first vacuum out dirt and debris. Then, add a delicate detergent to warm water and use a sponge or cloth to wipe the pack down. Some pack manufacturers also recommending avoiding hot water or spot removers, as these can damage the fabric.

As you clean your pack, examine the zippers, which can fail if they’re jammed with dirt and debris. You can vacuum out the dirt, or scrub zippers with a soft nylon brush (like a toothbrush) and cold water.

After you wash the bag, don’t put it in the dryer, either: The heat levels are too intense and can break down fabrics and foams. A good way to dry your pack is to stuff it with newspapers and hang it in the shade.

Storing

Once you’ve cleaned your pack, store it in a cool, dry place, and hang it if possible. Don’t leave your pack on the garage floor, because standing water or other liquids like engine oil could seep into the pack and damage it. Also, if your pack is on the floor, mice can chew through the fabric while searching for crumbs.

Tent Care

72z9xa5mFOEa2ug04yuMsY
Check your tent zipper for holes in the fabric from abrasion or snags, and be sure to clean the teeth of gunk or dirt build up. ih

Cleaning

When you return from camping in the rain, it’s critical to dry your tent to prevent mildew and fungus from forming. The primary problem is that these elements will damage coatings on tent fabrics. Plus, they’ll make the tent stink.

If you do get mildew, it’s very difficult to remove it completely, but you can treat it with a mixture that includes non-detergent soap and one cup each of salt and lemon juice, plus one gallon of hot water. Use this solution and a soft nylon brush to scrub the interior and exterior of the tent as well as the fly. Next, dry the tent in the sun. As with packs, you shouldn’t put your tent in a dryer because excessive heat will damage the fabric and coatings.

Storing

It’s fine to store your tent in its stuff sack. The primary concern is to prevent the tent fabric from being exposed to heat and sunlight over a long period of time. If you pitch your tent in the backyard for a campout with the kids, for example, don’t leave it up for weeks at a time. As with your pack, it’s best to store the tent in a cool, dry place off the floor.

Sleeping Bag Care

2IRRNEgvSwsgQKeIWQOECw
Front-loading machines are better for washing down products, especially your sleeping bag. Marcus Woolf

Cleaning

During an extended camping trip, a sleeping bag can get pretty ripe. When you get home, use non-detergent soap, water, and a soft brush to clean dirty spots on the shell. Don’t forget to clean the interior of the hood and collar where oil from your body can collect.

If your bag is really grimy, it’s best to wash it at a laundromat, because front-loading machines there won’t agitate the bag as much as your home machine. Also, commercial machines are larger and clean the bag more thoroughly than smaller home machines. It’s important to never wash a bag in a top-loading machine with an agitator, because it could rip the bag and stress fabrics and seams. Also, don’t dry clean a down bag, because the process can break down natural oils in the insulation.

At the laundromat, use cold water, a gentle cycle, and either mild soap or a special cleaning solution designed specifically for down insulation or synthetic insulation. While cleaning the bag, you can also use a special spray to restore its DWR (durable water repellent) coating. You can usually find the cleaning solutions and DWR spray at an outdoor gear store.

Storing

You shouldn’t store your bag in its small stuff sack, because over time compressed insulation will lose its loft and its ability to keep you warm. Many bag manufacturers supply a larger net bag for long-term storage, or you can hang the bag in a large cotton sack or even a large pillowcase.

Footwear Care

2XGHLQFYbSaIQkmK6EwGS0
Some shoes are beyond repair, but cleaning and drying footwear properly can extend the life of your gear. Marcus Woolf

Cleaning

Over time, dirt, mud, and sand can deteriorate the leather in boots and shoes and cause wear and tear on the fabrics and stitching in synthetic footwear. So, to properly care for your boots and shoes, within a day or so of returning from a trip, clean them with a brush and water or a cleaner that the manufacturer recommends. Avoid using detergents and bar soap, because they can harm leather and waterproof membranes in footwear.

Drying and Storing

When drying footwear, remove the outsoles and let them air out. It’s best to dry footwear in the house, because you want a cool, dry place that’s not especially humid (especially important in the hotter months in Alabama). If you want shoes or boots to dry faster, put them in front of a fan and stuff them with newspaper. Avoid drying them next to a heater, which can harm the glue and leather in footwear. Also, shoes or boots can break down more quickly if you store them in a place with extreme temperatures or poor ventilation, such as a garage, attic, or the trunk of a car.

If you plan to hike with fairly old shoes or boots, examine them and take them for a test run before you embark on a big trip. Over several years, the glue used to secure the outsole of shoes can simply break down, especially if you’ve kept them in a garage or unconditioned storage facility. We’ve seen outsoles peel off a pair of old boots while a hiking partner was ascending a pass deep in the Sierra Mountains. Though it might make for a good story later, it’s no fun to hike with blown-out boots wrapped in duct tape.


Need patches for your tent, water repellent or just new gear? We have the Spring outdoor gear you need to get you back on the trails! We want everyone to enjoy the outdoors, and we work to build loyalty one connection at a time. Visit one of our stores or take advantage of our shipping or curbside pickup! #BeOutdoors


Written by Marcus Woolf for RootsRated in partnership with Blue Cross Blue Shield of AL and legally licensed through the Matcha publisher network. Please direct all licensing questions to legal@getmatcha.com.


Featured image provided by Doug Letterman

3 Tools to Help Young Skiers Learn


Don’t hesitate to introduce kid-friendly tools that can help your young skier progress faster and have fun doing it.

Teaching your young kids to ski can feel daunting. Heck, getting young kids to the mountain, dressed properly, and clicked into their skis can be daunting, let alone teaching them to ski. We’re here to help.

But first things first: How do you know your kiddo is ready? We asked Brian and Aleks Smith, PSIA instructors at Aspen Snowmass and parents of two daughters. The Smiths work with the youngest sliders all winter, and what’s more, they went through the process of introducing the sport to their own girls not too long ago. In other words, the instructor pair is a wealth of information when it comes to the how and when to get the groms sliding.

Most kids are ready to hit the slopes between the ages of 3 and 4, says Aleks Smith, but some 2-year-olds may already be interested and able. One thing to look for is the ability to balance, says Smith, e.g., riding a push bike or playing soccer or other sports. The other thing is interest: Do they want to try skiing?

Once you’ve determined that your child is ready, one option Smith recommends is using props. “Many parents choose to use tools to aid in their children’s skill development,” Smith says. “If used properly, these tools can be useful.” The props Smith reaches for most often are the harness, the Edgie Wedgie, and the Hula Hoop. Here, Smith walks us through how to use each prop safely and successfully.

Prop: Hula Hoop

.
Ski Magazine
  • Age : 2-3
  • Indication : Child is struggling to maintain balance while sliding

The idea here is to teach young kids to stand independently while sliding forward and resist the urge to lean back. Slip the hoop around the child’s waist and hold onto the back of it. You’re in control, while the child feels the sensation of sliding.

  • _ No longer needed : When the child isn’t leaning against the front of the hoop_

Prop: Edgie Wedgie

  • Age : 2-5
  • Indication : Child is having trouble keeping his tips together
.
Ski Magazine

Making a wedge can be difficult for kids five and under, as they often don’t have the leg strength to hold their skis in that position. That’s where the Edgie Wedgie comes in. This device easily attaches and detaches to the tips of the child’s skis. Ashe stretches the Edgie Wedgie, his skis will naturally form a wedge; the bigger the stretch, the wider the wedge. Once the child understands the shape and knows what it feels like to arrange his skis just so, he should be able to start to wedge without the Edgie Wedgie.

  • No longer needed : When the child isn’t stretching it while turning or stopping

Prop: Harness

.
Ski Magazine
  • Age : 2-6
  • Indication : Child can’t stop on her own or is nervous

A harness is a great tool for very young kids who haven’t figured out the wedge stop. It can be tricky to put on properly, so be sure to read the directions. The idea is to keep your little skier in front of you as you descend very gentle terrain, holding the straps with some slack. Don’t ever tug on the straps, or you can throw the child off balance.

  • No longer needed : When the child can stop on her own


Now that you have the tips, tricks, and tools, shop with us in-store or online for all of your ski gear essentials! We want everyone to enjoy the outdoors, and we work to build loyalty one connection at a time. Visit one of our stores or take advantage of our shipping or curbside pickup! #BeOutdoors

Written by Samantha Berman for Ski Magazine and legally licensed through the Matcha publisher network. Please direct all licensing questions to legal@getmatcha.com.


Pro Tips on Building the Perfect Campfire


Building the perfect campfire: an indispensable skill for any outdoors enthusiast, given the life-saving properties of an emergency blaze—not to mention the fundamental bragging rights. (Take that too far, though, and you’ve got one of those arenas prone to obnoxious contests and condescending tutorials by insecure campers compelled to demonstrate their outdoorsy and macho bona fides.) Really, there’s no one formula that translates to the “best” campfire: There are certainly various options for fuel arrangement and materials, as long as you understand the basic principles of combustion.

For some lucky souls, efficient fire-kindling is intuitive, their method honed through a lot of practice (or maybe some innate talent inherited from thousands of generations of fire-making ancestors). It’s absolutely possible to achieve such skill level without ever learning about the chemistry of combustion. But your fire-building props can only be enhanced with a bit of knowledge of the science behind coaxing flame out of wood—not to mention some insider tips on fire-building in inclement conditions, cooking over fire, and being a responsible fire-maker.

The Fire Triangle, and Other Combustion Basics

Perhaps you know the three fundamentals of combustion composing the “fire triangle”: fuel, heat, and oxygen. All three—in proper proportions, too—are required to set those flames happily dancing, and managing them is your M.O. as a fire-maker.

In combustion’s pre-ignition stage, a heat source (“pilot heat”) ramps up the temperature to dry out the fuel, boiling away its moisture, and volatizing oils, resins, and other compounds. This creates a waft of flammable gases above the fuel that the pilot heat can then set alight in the ignition stage. As flaming combustion proceeds through the explosive, energy-releasing reaction of oxygen and fuel gases, enough heat is generated to convert the fire into a self-perpetuating one.

The all-important reaction zone—where oxygen and fuel gases engage with one another and split their chemical bonds—must eventually collapse to the solid fuel in order to keep the combustion going. This is when the glowing and smoldering (as opposed to flaming) phases initiate, producing more fuel gases and also char: a black carbon coat representing incomplete combustion. As the fire eats up the available fuel, white mineral ash remains.

Tinder, Kindling, Fuel Wood

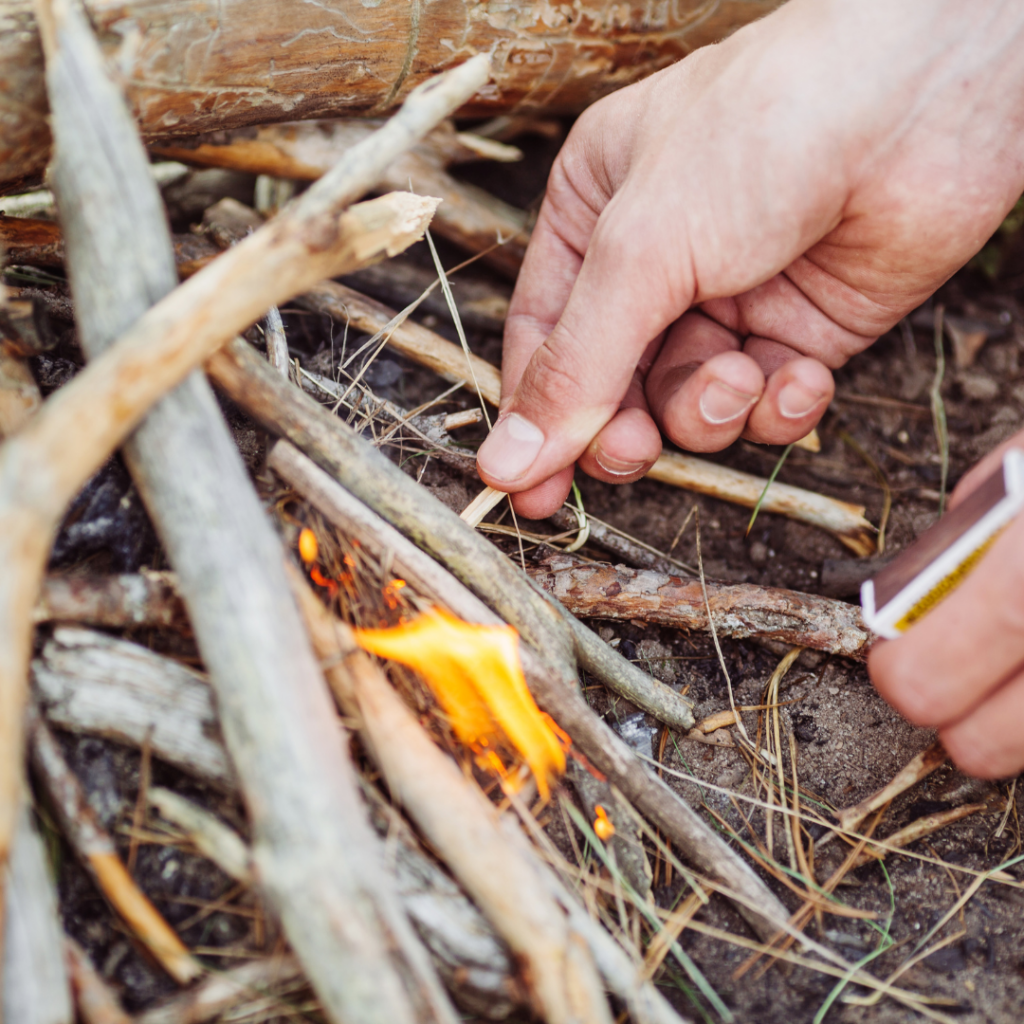
To get a fire going, you need to generate enough heat to dehydrate unburned fuel. As you might imagine, a piece of fuel with a large surface area-to-volume ratio heats more quickly and kicks off flaming combustion sooner than bulkier fuel. A drier piece of fuel also burns more readily because less pre-ignition heat is required to steam off moisture. So you want fine, dry material—the all-important tinder—to catch the initial flame from your pilot heat source (a lit match, a lighter, etc.).

Good sources of tinder include wood shavings, dry leaves, pine needles, dry moss, straw, newspaper, dryer lint, and char-cloth. This is an age-old firestarter made by singing cotton or other fabric (which is also the stuff stored in old-school tinderboxes).

Next up in the fuel-size department is kindling: branches or narrow lengths of split wood. Kindling, of course, burns through quickly, so ultimately you want to use it to ignite thicker, larger logs as longer-burning fuel wood.

Softwoods—conifers, basically—are less dense and more volatile than hardwoods, which makes them ideal fire-starters but poor choices for sustained heat. So if you have the choice you might light a fire with softwood kindling, then transition to hardwood logs.

Campfire Structure

Perhaps the most important thing to remember when constructing the fuel structure of your campfire is allowing for infiltration by oxygen. In other words, you have to give the flames some breathing room.

Different campfire configurations have their own devotees. The “teepee” consists of kindling and logs leaning in against one another in a roughly conical form. The “lean-to” is a piece of green wood rammed at an angle into the ground to form a ridgeline for rafters of fuel wood, with the tinder lit beneath this roof. The “pyramid” is a structure of crisscrossed scaffold of wood getting larger from top to bottom, upon which the fire is lit.

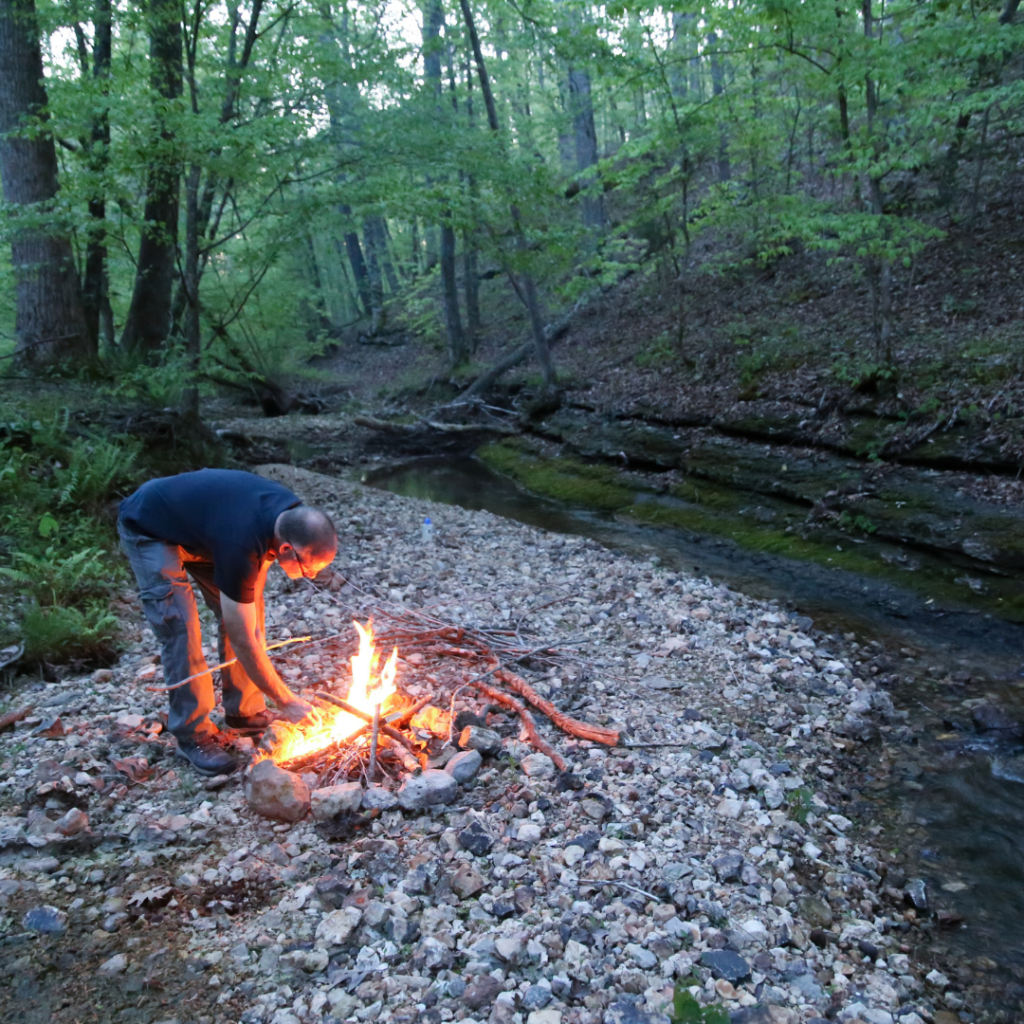
One good approach to give your fire an initial skeleton and allow for good airflow is to lay down a piece of kindling or even fuel wood, then brace another against it. Place a generous nest of tinder in the crook formed, and use the scaffold to support twigs, branches, or small splits around and over this tinder mass—but don’t shield it too densely, or it will struggle to get enough oxygen.

Starting the Fire

Light your tinder nest, loosely framed by small kindling. Blowing or fanning the flame can pump it up, but if you overdo it you can easily snuff it out; aim for a fairly gentle but steady inflow of air. Use a twig or poker stick to carefully push any bits of tinder that fall or drift away back into the bundle.

Ideally your small kindling starts catching once the burning tinder has sufficiently preheated it and formed a fuel cloud above it. Keep adding kindling to build up a decent flame, then once you’ve got some good heat going, lay a few thick fuel-wood branches or splits across the fire, placing them fairly close together while allowing narrow gaps for oxygen to circulate.

Maintaining the Fire


Starting a fire is its own challenge; keeping it going is another. If igniting a campfire is all about structure, balance is key to keeping it burning.

Balance involves several concepts: the balance between placing logs too close together (thus throttling the fire for insufficient oxygen) and too far apart (resulting in insufficient heat and intensity); and the balance between adding too much fuel—restocking the fire too frequently—and starving it. Generally speaking, it’s the balance between fiddling too much with the fire and downright neglecting it.

Which is actually a fairly profound point. Consistent with the tendency of certain campers to commandeer the fire-making process is the impulse to constantly prod and rearrange the fire: an inability to keep one’s hands off the thing. It could be neurotic obsession or the primal joy of engaging with open flame, but often enough it’s showmanship again: an attempt to convince onlookers that only your continuous, fiddly adjustments are keeping that fragile campfire going.

Resist that impulse. A fire excessively monkeyed-around with may well go out; if nothing else, it’s unlikely to achieve its full, rolling glory, that perfect combination of oxygen and fuel and heat. You are the source of ignition; once the fire’s going, you’re its provider. But the fire knows how to burn, knows how to prepare a hunk of cellulose and lignin to combust. Once independent of its pilot heat, a fire has its own momentum and rhythm, and you should leave it alone as much as possible.

That said, occasional shifting of the campfire wood is useful, because it knocks off the ash that naturally accumulates on the wood surface and which, if undisturbed, can thicken enough to choke out combustion.

Another practical thing you can do if you’re feeling a bit handsy toward your fire is staging unburned wood around the combustion zone so you’re getting a jumpstart on the preheating process. That’s an especially good idea if your wood supply is a little on the wet side.

And Speaking of the Wet Side…

Starting a fire under friendly, clear evening skies is one thing, but what about in a steady drizzle—or an all-out downpour? You’re probably not making a recreational fire if it’s pouring buckets, but a campfire’s totally doable (and welcome) in a light rain; and needless to say, in a survival situation you may find it critical to get a blaze going in cold, wet conditions.

You should have an emergency cache of firestarters and/or tinder (char-cloth, cotton balls marinated in petroleum jelly, dryer fluff, or newspaper) along with your matches and lighter in a waterproof container anytime you hit the wilds, on the off-chance such a survival situation presents itself. But you can also often rustle up reasonably dry tinder even in a rainstorm by foraging for pine needles, dead leaves, and other forest litter under the shelter of dense-canopied trees or shrubs, logs, rocky alcoves, and the like. You can also split thick branches or small logs with a knife or hatchet to make tinder and kindling from the dry inner wood.

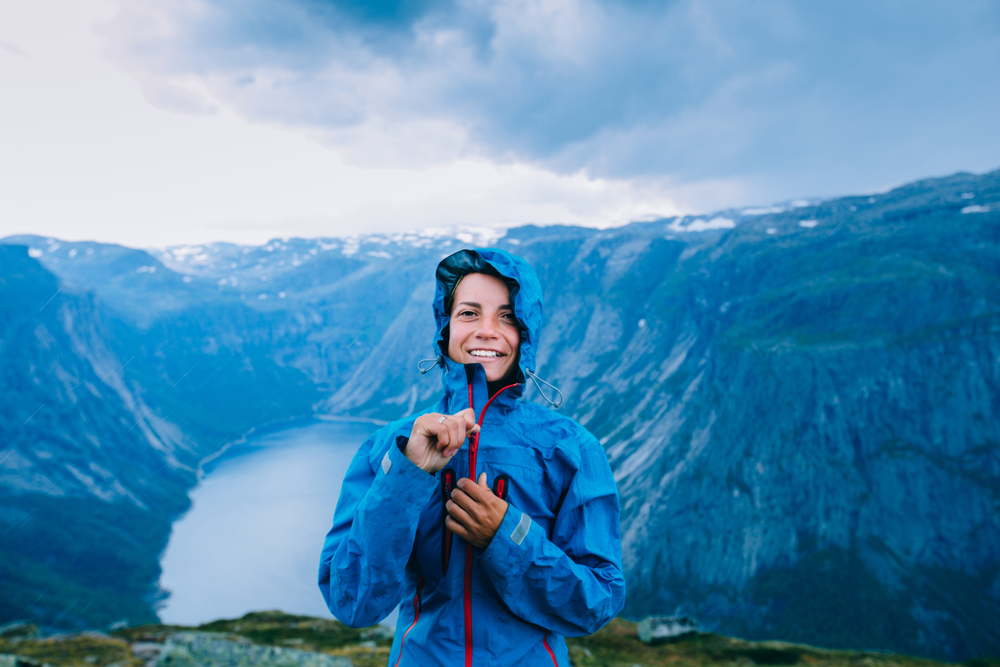
To shield your fire from rain, build it under an overhang or a tree, preferably a thick-needled and wide-branching conifer; just exercise common-sense precautions when managing the campfire under the potentially flammable foliage above. If you keep your fire small and well-controlled, you could also make it under a tarp or poncho strung up as a slanted roof.

Elevate your campfire off the wet ground by making a base of crosswise-stacking branches or large twigs, or of flattish stones. For fuel wood, gather as dry pieces as you can find, and, again, stage them around the fire before putting them on the flame to help dehydrate them some. A hot-enough fire will burn damp wood satisfactorily, though it’ll of course be on the smoky side.

The Cookfire

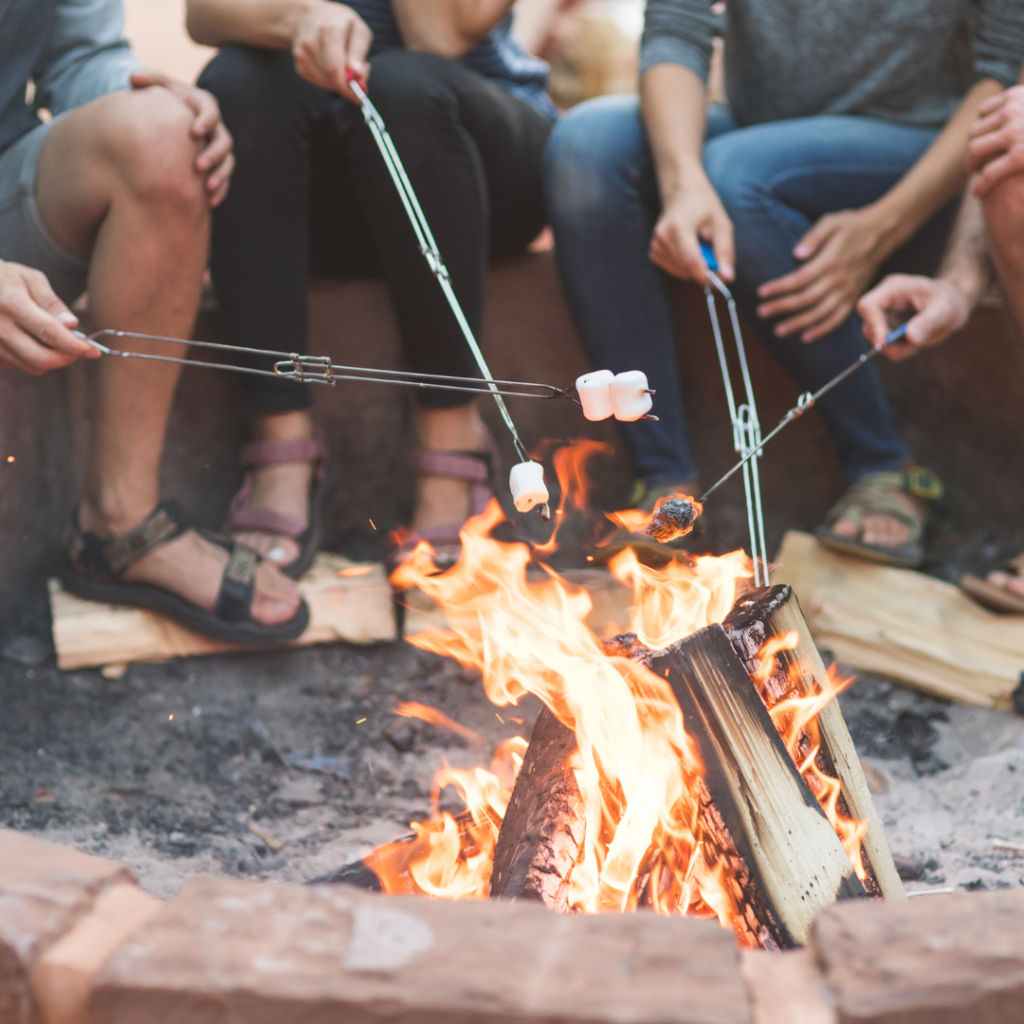
A fire that supplies warmth, cheery light, and inspiration for war stories, ghost stories, and crappy jokes is already a plenty useful one. A fire that cooks your dinner, too? Heck yeah!

Those iron grates over many a developed campsite fire-ring suggest the world of flame-cookery beyond roasting marshmallows or hot dogs. And you’ve got a lot going for you even if your culinary skills are on the limited side: Not only does everything taste better outside, but everything tastes even better kissed by a few flames.

Of course, fire cooking in general is less about flames and more about coals. The glowing phase of combustion with its pulsing embers supplies the steady, strong heat you want. So good news for those who like hands-on fire-tending: You need to actively cultivate a nice bed of coals to prep your campfire for cooking. To construct that coalbed, keep a rigorous and well-packed fire going. As coals begin piling up, you can start transferring them aside to a separate corner of the firepit for cooking. Continue replenishing coals as needed from the fire. A glowing (not flaming) log can be a good source of cooking heat as well. (While you can do all this coal-wrangling with a pair of poker sticks, tongs certainly come in handy.)

You can also use a Dutch oven suspended over the fire, or loaded with coals underneath and on the lid to fire up ready-to-cook stews, roast meat, bake bread—you name it.

No grill, no pan, no Dutch oven? You can still whip up some fire-kissed deliciousness. Cook directly on coals or within ashes by pouching food (diced potatoes, for example) in aluminum foil, or by taking advantage of natural outer skins that can be charred. Garlic, onions, eggplant, corn still in the husk, squash, sweet potatoes, plantains—many veggies and fruits can be roasted “naked” to perfection on a coalbed or buried in hot ashes. This kind of cooking is about as low-maintenance as it gets, and the charred, caramelized goodness that comes from the firepit is likely to knock the socks off your fellow campers.

Fire Ethics and Safety

Campfires are wonderful things, obviously, but as a responsible outdoorsperson you’ve got some important considerations to keep in mind. First of all, remember that a campfire exerts an environmental toll. Where fuel is naturally limited (above timberline, say), or in areas with very heavy recreational use, you should skip the fire in favor of camp stove cooking and stargazing. In such places, campfires may be outright prohibited; there are also often seasonal campfire bans when wildfire danger is high. Obviously follow any and all fire regulations.

Don’t break off live branches or foliage for fuel except in life-or-death situations; keep to the “dead or downed” protocol. Because of the risk of spreading forest pests or pathogens, you should only burn locally sourced firewood.

Bonfires are all well and good for certain occasions—namely, beach parties and bacchanals (and, of course, with a permit where required)—but more modest-sized blazes are usually your best bet. A large campfire can quickly get out of hand and increases the likelihood of surrounding vegetation catching flame—plus with all that leaping light you’re missing out on some of the pleasures of the dark, the night sky among them.

Whether you’re backpacking or car-camping, you need to follow old Smokey Bear’s advice and make sure that fire of yours is dead out. Mishandled campfires start a whole lot of wildfires: not the sort of thing you want to set in motion because of negligence.


Find your favorite summer gear at Alabama Outdoors. We want everyone to enjoy the outdoors, and we work to build loyalty one connection at a time. Visit one of our stores or take advantage of our shipping or in-store pickup! #BeOutdoors


Written by Ethan Shaw for RootsRated and legally licensed through the Matcha publisher network. Please direct all licensing questions to legal@getmatcha.com.

Featured image provided by Evan Wise

5 Tips to Ward Off Ticks During Spring in Alabama

20180329-BCBSAL-ticks-forest2

Learn the steps to protect yourself from Lyme disease contracted from ticks.

Please note: due to local and state guidelines surrounding the Covid-19 pandemic, some information below may not be accurate. Before you travel and plan your next adventure, make sure to check each business/park/campsite for any closures or guidelines and for the most up to date information. Enjoy your next Spring hike well prepared to ward off the critters!

In Alabama, the springtime brings so many wonderful things, like wildflowers and warm, breezy air. But, it also brings something that literally bugs us—ticks. Lots and lots of ticks. When we hike this time of year, we always end our day with a “tick check” to make sure no uninvited guests have hitched a ride.

In recent years, an increasing number of people in the United States have contracted Lyme disease from ticks, and spring and summer are the peak seasons for ticks. To help you stay healthy, we’ve highlighted important info about ticks and some advice to help you avoid these blood-sucking creatures..

Know The Enemy

4h1yOFjzdKEc2wWyEI6AYy
Adult deer tick, Ixodes scapularis. USDA photo by Scott Bauer. Scott Bauer/U.S. Department of Agriculture


The first step is to know what types of ticks are common where you live or where you plan to be outdoors. There are many species of ticks in the United States—wood ticks, dog ticks, Lone Star ticks, Blacklegged ticks (a.k.a. deer ticks)— and they carry different diseases. If blacklegged ticks aren’t common in your area, then you’re at a lower risk of getting Lyme disease. You can determine the types of ticks in your neck of the woods and the current level of tick activity by visiting (www.tickencounter.org). Plus, the site has a helpful Tick Identification Chart.

Perform Daily Tick Checks

The best time to do a tick check is when you get back home, or get back to camp—basically, when you can strip down and look carefully at your entire body in decent light. There’s even a Tickencounter app to help you know where on your body to search for ticks.

Treat Clothes with Tick Repellent

14jJjGlUrmMAeMcScUmaqK
Some ticks hide in leaves, so they’ll crawl up from the ground. Andrea Wright


Ticks don’t fly or fall from trees—they crawl up, and they want to feed on blood around the head, neck, and ears of their host where the skin is thinner and hosts have more trouble grooming. So, your prevention strategy should begin from the ground up. Nymphal deer ticks—the ones the size of poppy seeds—hide in leaves, so they’ll crawl up from the ground. To avoid them, treat your shoes with Permethrin bug repellent.

Lone Star tick nymphs hang out a bit higher than the leaves, and they’ll crawl up your legs, so use Permethrin spray to treat the inside of pants or shorts, or get clothes pre-treated with a repellent like Insect Shield. Keep in mind that ticks are more likely to walk up the inside than the outside of your shorts. If a tick rubs against permethrin for five to 30 seconds, it will likely get a dose that causes it to fall off and eventually die.

Remove Ticks with Tweezers

Use pointed tweezers to remove a tick as if you were removing a splinter. Try to grab the mouthparts right next to the skin. Don’t try to kill it by squashing it, because that will push germs to the front end of the tick, which is attached to your skin. Also, things like hot matches and Vaseline don’t work as consistently as tweezers.

Protect Your Pet

OuSwUMOGqsas4M8GwI4Wc
You can remove ticks from your pet using tweezers. Shannon McGee


If you hike with your dog, be sure to check your pet for ticks before you hop back into your car, as ticks can latch onto fur or your dog’s skin and hitch a ride into your home. You can remove ticks from your pet using tweezers, and you might consider treating your pet with a product that can kill ticks or make them detach quickly.


Ready to be outdoors this Spring? We have the Spring outdoor gear you need to get you back on the trails! We want everyone to enjoy the outdoors, and we work to build loyalty one connection at a time. Visit one of our stores or take advantage of our shipping or curbside pickup! #BeOutdoors


Written by Marcus Woolf for RootsRated in partnership with Blue Cross Blue Shield of AL and legally licensed through the Matcha publisher network. Please direct all licensing questions to legal@getmatcha.com.

Featured image provided by Larry Bell

7 Tips for Winter Hammock Camping

20171207-Alabama-Hammock Camping

If you camp in a hammock in winter, you need to take extra steps to stay warm.


With the right strategy, hammock campers can sleep comfortably during cold winter nights.

They call it “cold butt syndrome.” When you sleep in a hammock, the parts of your body that press against the fabric get cold because they’re more susceptible to the wind.

If you camp in a hammock in winter, you need to take extra steps to stay warm. Leaning on our own experience, as well as advice from hammock manufacturers, we’ve come up with seven solid tips to help you stay toasty in your hammock.


Seek Natural Shelter & Consider the Wind

As you set up your hammock, a main goal is to deal with potential wind. So, note the direction of the wind and take advantage of natural windbreaks, like hills, rock formations, and trees. Instead of hanging your hammock in an area that’s relatively open, move to a cluster of trees and take advantage of their natural sheltering effect. You could also consider hanging a tarp between two trees as an extra layer of protection.

4qNgxstw2kkigcyQOyao86
An alternative to an under quilt is an under pad. jchapiewsky

Use Quilts to Stay Warm

To help trap heat and block the wind, use an under quilt, which is an insulated blanket that you string up beneath your hammock. This creates a layer of air between the quilt and the hammock, so heat is trapped to provide more insulation. You’ll be warmer if you deploy an under quilt, rather than just using a sleeping bag inside your hammock. In a hammock, the insulation in a sleeping bag gets compressed and loses its ability to trap heat.

While a sleeping bag will still do a good job of insulating the top of your body, many hammock campers forego a bag and instead use a top quilt that’s made specifically for a hammock. Typically, top quilts are light and compressible, so they’re easy to carry into the backcountry.


Use a Sleeping Pad

An alternative to an under quilt is an under pad, which you place beneath you inside the hammock. You can use a standard foam or inflatable sleeping pad, but be aware that these can slip and even slide out of the hammock as you move around while sleeping. Some hammocks have an inner compartment that holds a foam or inflatable sleeping pad and prevents the pad from shifting.

Another option is to invest in a pad made specifically for a hammock. These not only have side sections that fold to conform to a hammock, but some also feature materials that reflects your body heat. You can also find sleeves that slip over a pad and have reflective materials to help you retain heat.

2ToUPt6l0IW6eIUoiKSGSe
Rig a tarp above your hammock to protect you from the elements. Buddy Lindsey

Rig a Tarp Above the Hammock

If you rig a tarp above your hammock, it can block wind, rain, and snow, and also trap heat. Keep in mind that it’s best to place the tarp as low as possible. Once you’ve attached the tarp to a spot on the tree just above your hammock straps, pull the tarp corners as low as possible and secure them. On the market you’ll find a wide variety of rainfly and tarps from several hammock manufacturers.


Rest Your Head on a Pillow

To stay warm in winter, you should prevent your skin from pressing against the hammock fabric as much as possible. So, pack a travel pillow, and also cover your neck and shoulders as you sleep.


Layer Your Clothing

It’s a good idea to wear many layers when you camp in winter, even when you’re using a hammock. This will allow you to regulate your temperature to keep from getting too hot or too cold. With a little practice, you’ll even learn to add and remove clothes without leaving the cozy confines of your hammock.

It’s wise to keep extra clothing inside your hammock at all times so it stays warm and readily available. Also, be sure to remove snow from your clothing before you get into your hammock. While this might sound obvious, it can make a big difference in keeping you dry and warm.


Stash a Hot Water Bottle

Here’s a trick hangers have used for years—fill an insulated water bottle with boiling water before you go to bed and stash it near your feet. This will help warm your whole body during the night.


Looking for help with your holiday shopping list this year? Check out our holiday gift guides for ideas for everyone on your list! We want everyone to enjoy the outdoors, and we work to build loyalty one connection at a time. Visit one of our stores or take advantage of our shipping or curbside pickup! #BeOutdoors


Written by Marcus Woolf for RootsRated in partnership with Blue Cross Blue Shield of AL and legally licensed through the Matcha publisher network. Please direct all licensing questions to legal@getmatcha.com.

Featured image provided by Andy McLemore

5 Tips to Beat the Summer Heat

Many outdoor enthusiasts look forward to the long days of summer and all the activities you can enjoy in warm weather.

girl-running-summer-heatBut when triple-digit heat indexes start making regular appearances in the weather forecast, hiking in Oak Mountain, kayaking down Cypress Creek, and even lounging on Orange Beach can suddenly seem less appealing.

Older adults and the very young are most at risk for heat-related illness, according to the Centers for Disease Control. But even young and healthy people can be affected if they participate in strenuous physical activities during hot weather, the CDC says.

There are ways to beat the heat and still enjoy the outdoors without endangering your health. Here are five tips for staying cool and getting your outdoor fix.

  1. Stay cool by picking the right clothing

    If you have an outdoor activity, pick clothing that is lightweight, light-colored, and loose-fitting. Look for clothing made out of fabric that breathes and wicks away moisture.

    beat-summer-heat-bootcamp-workoutFabrics used in activewear such as cotton, nylon, and polyester are soft and durable. Some brands, like Freefly, for instance, use bamboo blends because bamboo not only feels buttery soft, it also wicks away moisture and dries quickly. Others, like Vuori, incorporate Coolmax technology in their clothing to help manage moisture.

  2. Stay hydrated to beat summer heat

    When temperatures are soaring like they are now, don’t wait until you are thirsty to drink water. A good rule of thumb: Try to drink at least a half-liter of water per hour if you are doing moderate activity outdoors. Increase the amount you drink as the intensity and temperatures rise. Also take into account any health conditions that may require you to drink more water, like diabetes or heart disease.

    Another way to figure out how much water you need: Weigh yourself before and after a run, a hike, or a strenuous walk. Drink an additional pint of water for every pound of sweat you lose.

    When you go for a run, a hike, or some other outdoor adventure, be sure to bring along a well-stocked cooler with water, electrolyte-replenishing drinks, and healthy snacks so you can stay ahead of the thirst. Throw a small wet towel or neckband in the cooler as well. When you need a quick cool down, place the cold towel around your neck or on your head for relief.

  3. Schedule activities based on the weather

    If you absolutely can’t stomach the idea of scaling back your running regimen, schedule activities around the hottest parts of the day. Plan exercise, yard work, and other outdoor activities during the early morning and late evening hours.

  4. Pace yourself

    dog-getting-sprayed-summer-heatWhen hiking, running, or doing another strenuous activity in the summer heat, be sure to pay attention to your body cues. Take breaks, be sure to drink water, check on your companions, whether they are human or canine, and eat healthy snacks like fruit to help keep you hydrated.

    Also, be aware of the signs of heat exhaustion and heatstroke. Heat exhaustion symptoms include muscle spasms or cramps in the abdomen or legs, clammy, pale skin, and nausea. If you think you may be suffering from heat exhaustion or heat stroke, seek medical attention.

  5. Protect yourself from the elements

    The summer sun can be draining and damaging, so make sure to protect yourself. Wear a hat to shield your face and scalp, invest in UV-protection clothing and quality sunscreen to protect your skin.

    And remember to reapply sunscreen throughout the day. It’s easy to forget when you are outside and having fun, but reapplying sunscreen will ensure you can enjoy more time outdoors.


Need to refresh your summer style? We can help! Alabama Outdoors wants everyone to enjoy the outdoors, and we work to build loyalty one connection at a time. Visit one of our stores or take advantage of our shipping or curbside pickup! #BeOutdoors