6 Tips for Planning the Perfect Overnight Canoe Trip in Alabama

20180918-BCBSAL-Canoe

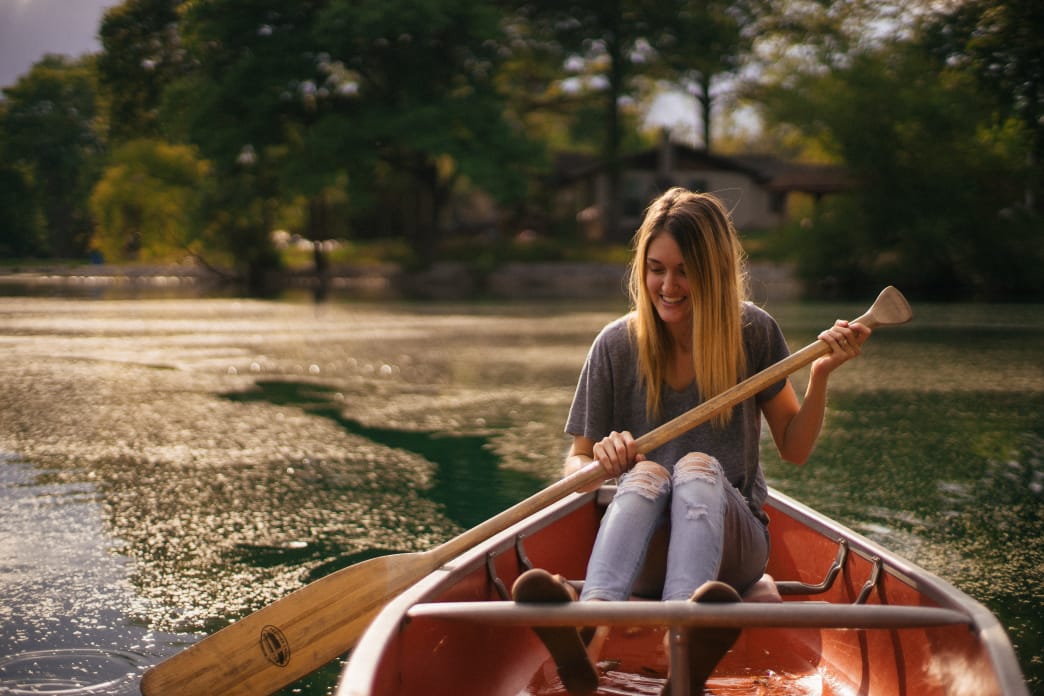
Plan the perfect overnight canoe trip in Alabama.

As summer transitions into fall, Alabama’s weather becomes the ideal backdrop for an unforgettable overnight canoe trip. In this blog, we’ll share six essential tips to help you prepare and make the most of this perfect season for paddling adventures.

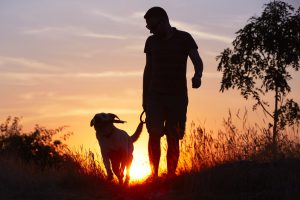
There is absolutely nothing more soothing than the sound of water lapping on a shore, canoe, or kayak, or the beautiful white noise of water roaring through a tight rocky chute or crashing on the shore of a pearly white beach.

If you’ve experienced these sounds, whether by kayak or canoe, you know how they can make a might outdoors especially tranquil. Now, imagine being lulled to sleep by these soothing sounds as you camp next to those waters.

Camping near a slow-moving blackwater river, beside a rushing stream, in dark and mysterious bayous, or along a sandy shore is truly a remarkable experience. Whether you’re a beginner looking forward to your first paddle campout or a seasoned boater, there are some important steps you need to take to ensure that your overnight paddling trip goes smoothly. Here are six of the most important things to consider.

1. Choose a Suitable Trip

The key to experiencing the perfect overnight canoe trip is selecting a destination that matches your desires and abilities. Of course, you want to select a journey that has plenty of natural beauty, history, wildlife, and maybe even a few challenges—but, it should be reasonable. It’s thrilling to dream of paddling among alligators in the dark bayous of the Mobile-Tensaw River Delta (aka “America’s Amazon”), but that dream involves certain risks that are suited to only the most seasoned paddlers.

Choosing the perfect trip boils down to picking a route that fits your skill level. If you’re a beginner, you should consider trying your first paddling campout with an experienced group or outfitter.

It’s also important to factor in time requirements. Consider how much time you have for a trip, taking into account travel times to the put-ins, take-outs, breaks for lunch, swimming, etc. That will help determine the length of the trip.

Start slow and work your way up to more challenging trips, and always keep it simple. Shorter trips on smaller bodies of water are just as fun and exciting as paddling larger waterways.

2. Consult the Experts

Pull out that old trusty paper map or guidebook or consult online maps to find a waterway to your liking. Then, use the internet to find local clubs and outfitters in the area of the waterway you want to paddle.

“The knowledge of an outfitter allows you to experience everything from whitewater to the salty waves of the Gulf of Mexico and everything in between,” says Jim Felder with Alabama Scenic River Trail (ASRT). “They can show you things it could take you a lifetime to learn otherwise.”

Outfitters can offer insights on the best times of year to paddle the waterway, and they’ll point out possible launch sites and takeout locations. Plus, they can inform you of possible campsites and identify areas prone to log jams and portages.

Another consideration is the weather. It’s not only important to be aware of storms so you can stay warm and dry, but it’s also important to know how weather affects the waterways. Heavy rain hundreds of miles north of a river will dramatically affect the river’s water levels farther south. Without warning, paddlers downstream of a storm could find themselves in swift, rising water. And keep in mind that it’s dangerous to paddle a river that has reached flood stage.

Many streams and creeks in the Southeast are seasonal, and rain greatly affects their water levels. During periods of heavy rain, waterways can reach flood stage and become too hazardous to paddle. During a drought, there might not be enough water to allow your boat to float, and you’ll end up dragging it frequently.

Before you launch, consult an outfitter, American Whitewater, or another resource to determine the current water flow of your destination and whether the conditions are safe.

You also need to identify quick escape routes in case of emergency. “With Google Earth and all the other satellite mapping resources these days, there should be little chance that you run out of places to get out of the water,” says Felder. “Anywhere a road crosses a creek, you can probably get out.”

3. Choose Campsites Carefully

Ok, so you’ve found the river you want to paddle. Now, what about camping? Many people think that any river, creek, or stream is publicly accessible. You may be just fine paddling that waterway, but unless designated campsites have been established, you may find yourself stepping out of the boat and trespassing on private property.

If land in the river—like a shoal or sandbar—has trees growing on it, it’s probably part of the adjacent landowner’s property. If there aren’t trees on the land, you’re likely OK.

Once again, this is where contacting local outfitters and paddling clubs comes in handy. You can also turn to ASRT, which has made things easier by logging hundreds of campsites along the state’s waterways.

4. Keep it Simple When Gearing Up

As you’re gathering your camping gear and supplies, remember the mantra “keep it simple.”

There’s no need to go fancy and invest in a lot of expensive gear. In general, you should try to carry a relatively lightweight load. Remember, you have to bring all of it with you. The size of your canoe or kayak will limit your load, and if you have to portage, you have to physically carry all of that gear with you. And, of course, extra weight and how it’s loaded can play havoc with the balance of your boat.

While it’s good idea to go light, don’t leave behind important essentials. Bring (and wear) your PFD, and be sure to pack food, water, a fire source, first-aid kit, flashlight, sunscreen, maps, and navigation devices. If you paddle during mosquito season, or if rain is a possibility, consider bringing a tent. Otherwise, you can choose to just sleep out under the stars.

Before you depart for your camping trip, do a shake down by loading your boat to find the perfect balance when stowing the gear. Then, eliminate any items that you decide you don’t really need.

Be sure to use watertight bags or containers to protect items that shouldn’t get wet, such as clothes, sleeping bags, electronics, matches or other fire-starting supplies.

5. Food and Water

The adventurer in all of us dreams of paddling down a river, dropping a line, and catching our meals fresh from the river. It’s a dream, friends. With luck you can, but it’s not something you want to rely on. So, do a little meal planning, and bring your own provisions. Most paddlers like quick and easy breakfasts to get the day started, a more substantial lunch, and a larger dinner.

Avoid carrying perishables like eggs, and keep things simple. Breakfasts can be as easy as oatmeal, cereal with dry milk, fresh fruit, bagels, or muffins. Lunches can be anything from PB&Js to tuna and crackers to summer sausage and cheese on crackers. For dinner, you can’t beat the latest freeze-dried meals. They’re tasty and quick, with easy cleanup. And, be sure to pack along your favorite snacks, too.

As for water, if you’re paddling freshwater that can be treated, bring the proper water-treatment system or a stove to boil water. Even if you’re prepared to treat water, you should still carry a minimum of one gallon of water per day per person.

6. Fire it Up

There’s nothing like sitting around a campfire after a day on a river. Before you shove off, check fire regulations to see whether or not campfires are allowed, where you can build them (sometimes they’re only allowed on sandbars), and if there are any burn bans in effect.

Organizing an overnight paddling trip for the first time can be a challenge, but it’s also pretty exciting. With all of the things you need to consider, it can feel like you’re planning a great expedition. By mapping out things carefully and gathering information from knowledgeable sources you’ll ensure smooth days on the water, and you’ll finally experience every paddler’s dream—a peaceful night where the lovely sound of lapping water lulls you to sleep.


We have the camping + outdoor gear you need to get you on the trails! Not quite ready to commit to all of the gear? We get it! Click here to learn more about our Rental Program for your next trip! We want everyone to enjoy the outdoors, and we work to build loyalty one connection at a time. Visit one of our stores or take advantage of our shipping or in-store pickup! #BeOutdoors


Written by Joe Cuhaj for RootsRated in partnership with Blue Cross Blue Shield of AL and legally licensed through the Matcha publisher network. Please direct all licensing questions to legal@getmatcha.com.

Featured image provided by Jordan Bauer

5 Summer Safety Tips for Dogs

Three dogs on a hike

We love spending time with our canine companions, but we have to look out for them in the summer heat, especially if they are active outdoors. Check out our summer safety tips for your active dog: 

Keep your pet hydrated

Pets get dehydrated quickly, so give them plenty of fresh, clean water, especially in the summer. Make sure your dog has a shady place to get out of the sun, don’t over-exercise them, and keep them indoors when it’s extremely hot.  Pro tip: Keep plenty of water and a packable water bowl for your dog with you when you go on trips, hiking, or on walks.  Then, your pup can have a drink of water no matter where you are.

Know the symptoms of overheating

Overheated pets may pant excessively, have difficulty breathing, drool, seem weak, or confused, according to the American Society for the Prevention of Cruelty to Animals. Other symptoms include seizures, bloody diarrhea, and vomiting. If your dog suffers from any of these symptoms, move your dog to a cooler location, place a cool, wet cloth, or a chilly neckband on your dog’s neck. Offer your dog cool water, and call your veterinarian. If your dog collapses, take him immediately to your vet.

Never leave your dog in a hot car

Even if you think you will only be “gone for a minute,” don’t do it. For example, on an 85-degree day, the temperature inside a car with the windows opened slightly can reach 102 degrees within 10 minutes.


keeping-dogs-safe

Adjust activity intensity on hot days

Adjust the intensity and duration of exercise on particularly hot or humid days. Try to schedule hikes and walks during the early morning or evening hours. Also, remember that asphalt can burn the bottoms of your dog’s paws. Stick to dirt and grass trails during the summer.

Keep cool treats in the freezer

Treat-dispensing rubber throw toys have long been one of the best ways to keep dogs entertained and happy. For a cool treat, try filling your pup’s toy with peanut butter and freezing it.  Not only are these treats that’ll entertain for hours, but you can also prepare them ahead of time. The American Kennel Club has some suggestions for DIY frozen dog treats.

The most important thing to do as a pet owner is to be aware of your dog. Make sure your pet is comfortable, isn’t showing signs of distress or discomfort, and adjust your outdoor activities accordingly. Take care of your best friend, so he or she will be able to share your love of the outdoors for a long time!

Trying to keep cool this summer? We can help. We want everyone to enjoy the outdoors, and we work to build loyalty one connection at a time. Visit one of our stores or take advantage of our shipping or curbside pickup! #BeOutdoors


Guide to Camp Cooking: 5 Common Mistakes to Avoid

Food forms a major part of the memories of and around camping. It’s the cooking part that’s fun and a little challenging. Good cooking will enhance the whole camping experience. Sometimes, we imagine and ‘cook up’ a scenario in our minds, and the experience turns out to be way different. Camp cooking is quite different from cooking at home.

Source: Pixabay

You wouldn’t want to spoil the food and the mood with cooking that’s gone awry. Whether you are a seasoned camping enthusiast or a beginner, learning some camp cooking tips and tricks should help you. First and foremost, make sure to tackle these five common camp cooking mistakes:

  1. Planning mistakes: No planning, insufficient planning, and excessive planning are all mistakes when it comes to camping cooking. However, over-planning might just be a lesser evil compared to the others. No planning is an ingredient for disaster and disappointment. Insufficient planning might lead to some inconveniences. Overplanning can be adjusted a little when you are implementing the cooking process. Plan your meals to avoid hungry group members and unnecessary delays. With the right quantities of ingredients and tools on hand, you’ll dodge emergency store trips. Stay prepared and enjoy seamless mealtime!


  1. Not giving the campfire its dues: This is with the assumption that you are cooking in the conventional camping style over a campfire. A campfire needs care and attention, as well as the right technique. Additionally, it requires patience and good materials. If you are starting a campfire in an existing ring, do take a few minutes to scrape away the old (often soggy) ashes. It’s best if you pack a jet flame torch lighter or a propane trigger torch for your camping trip. With either of these, you’ll find it easier to get a sturdy fire going. Gather sufficient tinder to light the kindling. Don’t smother your fire with the ashes of papers that burn out quickly. Split the wood, and it will burn more quickly and completely. Start early and nurture your campfire with patience until it turns into a steady and safe heat source. We recommend bringing a Pocket Bellow to help you start the fire with ease and be sure to check out our blog: Pro Tips on Building the Perfect Campfire.

    Source: Pixabay

  1. Cooking equipment mistakes: If you bring along other cooking equipment like stoves, you’ve avoided a camping cooking mistake, namely, relying solely on a campfire. But, consider this scenario: you brought along the required cooking equipment but did not check if it was working properly beforehand, and it failed you right on time. It is definitely a scenario you’d like to avoid. Clean and test your cooking equipment before heading out on your camping trip. If something is missing, broken, or damaged, do remember to purchase it, replace it, and get it repaired before the trip. Make sure you carry the required pots, pans, cooking spoons, and other tools required for preparing the meal items you have planned. For example, even though you prepare fresh lobster, you’re still going to need tongs to pick it up and a lobster cracker to enjoy it. Plan your meals, make a list of the equipment and tools you will require, and pack them with due diligence.


  1. Forgetting about food safety: It is equally important (if not more) to take care of food safety while camping in the great outdoors. When the conversation comes to food safety, most people assume it is about the handling of food. Although there are safety concerns around the handling of food, safely storing food is an equally large concern. You don’t want the camping trip to be ruined because someone fell ill due to food that was improperly stored or handled. Always remember to separate raw food from other food items. If you are carrying perishable poultry or meat products, carry them along with a cold source for safety. Even while you are out in the wild, washing your hands prior to handling and eating food is a must. Keep hand sanitizer and disposable wipes handy. Take all necessary precautions related to food safety, even while camping.


  1. Experimenting with complicated recipes: The issue with complicated recipes is that they require numerous ingredients and elaborate steps for preparation. They are also often quite time-consuming. When you go camping, we recommend making the most of limited ingredients and supplies. Leave the complicated recipes for experimentation at home and stick to basic, simple, and easy-to-prepare recipes for camping cooking. You can find some delicious s’mores recipes right here.


Final Words

One of the biggest mistakes is approaching camping cooking with the same kind of expectations that one has for home-cooked food. It’s going to be different; it is supposed to be different. And this difference is meant to be enjoyed and celebrated. When cooking while camping, enjoy the process to enjoy the results.


Author bio: Kevin Fagan

Kevin Fagan is a food & travel writer, based in New England. He likes to (try to) cook gourmet food at home, and travel to far-flung destinations.


Find your favorite summer gear at Alabama Outdoors. We want everyone to enjoy the outdoors, and we work to build loyalty one connection at a time. Visit one of our stores or take advantage of our shipping or in-store pickup! #BeOutdoors

Rent Backpacking and Camping Gear!

rent- equipment-for backpacking
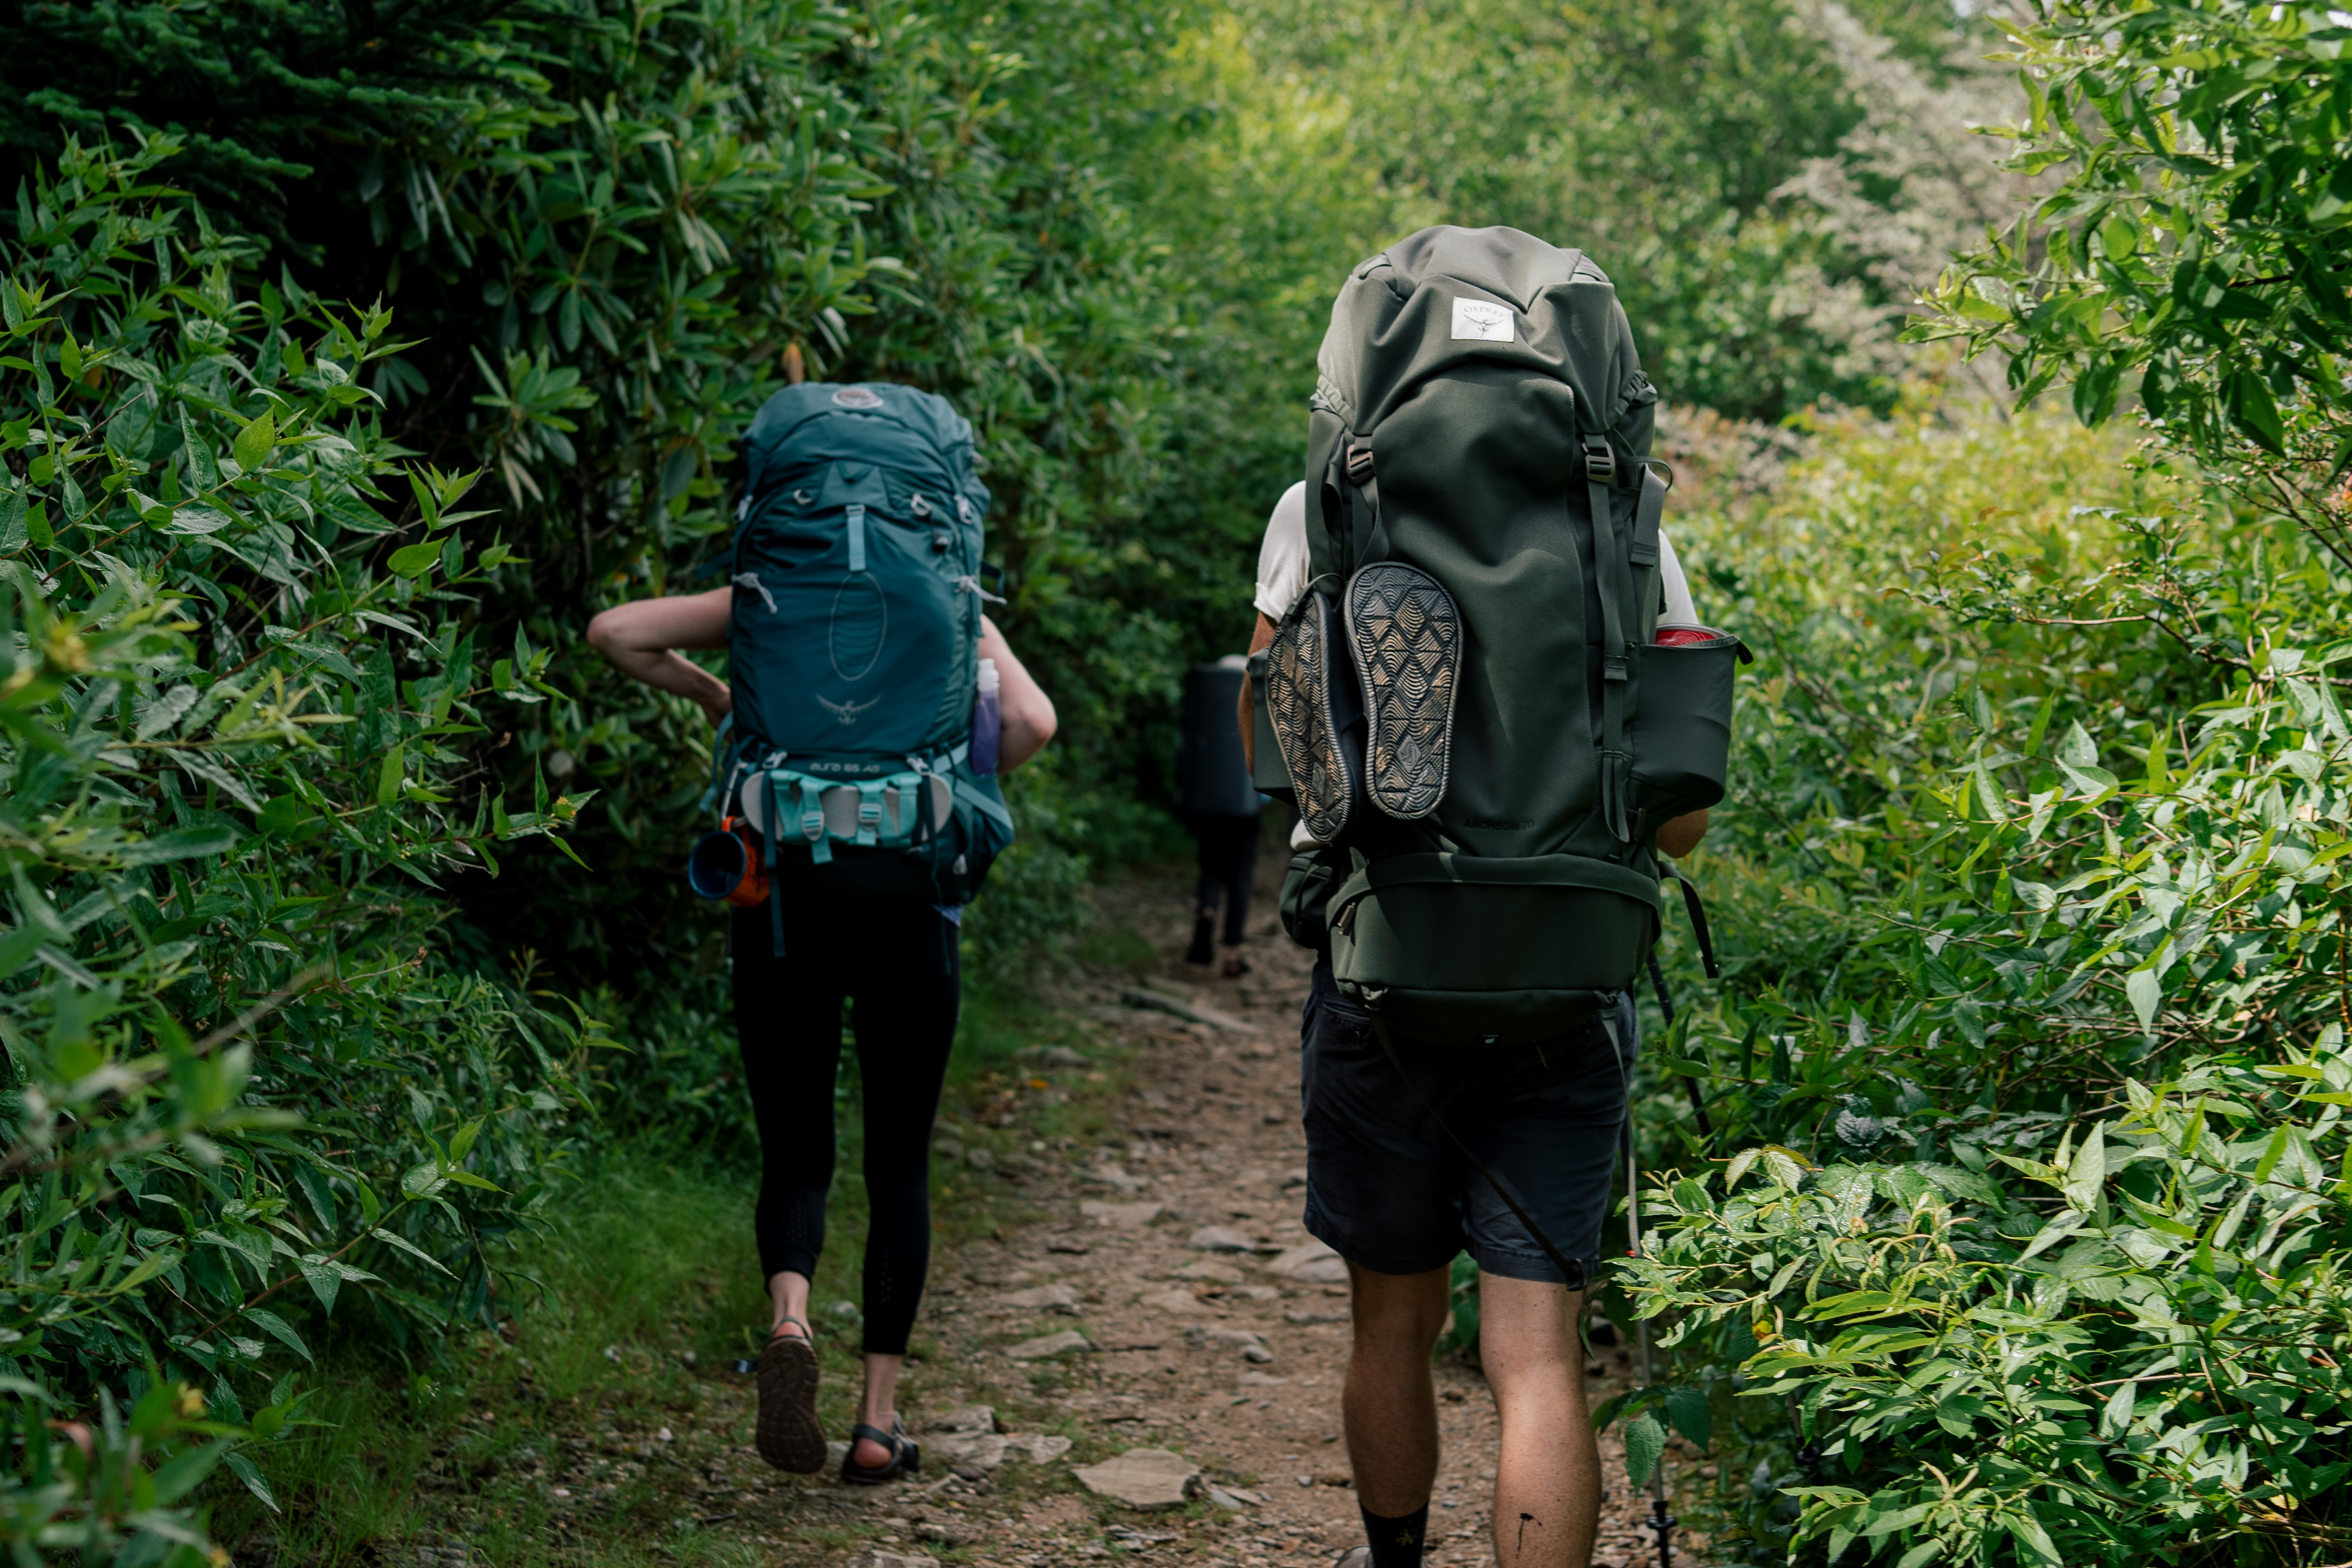
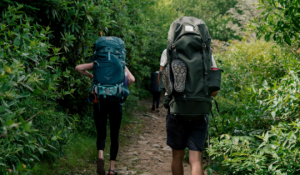
Hiking, backpacking, and camping are wonderful, enriching outdoor hobbies that can become lifelong passions. But they require an investment of time and money, especially when you start out.

If you are a beginner, you may decide hiking or backpacking isn’t the hobby for you. Wouldn’t it be great to try out the sport and some equipment to see if it fits you and your lifestyle?  We want you to love the outdoors. That’s why we offer a rental program to help you ease into your outdoor hobby.

Rent packs, tents, and sleeping pads

Alabama Outdoors rents a variety of packs, including ultralight and heavier packs for men, women, and children. We also rent men’s and women’s trekking poles as well as sleeping pads and tents. Packs, tents, and sleeping pads tend to be the most expensive equipment, so renting equipment first may help you decide if you like the activity and what you want to own for future adventures.

For your safety, we sanitize all of our rental gear. When a customer returns rented equipment, we place it in a holding area for 24 hours, then sanitize them before they can be issued to another customer.

It’s a great way to try out packs and different types of equipment.

If you are interested in renting hiking, backpacking, or camping equipment, drop by or call an Alabama Outdoors near you for more details about availability, options, and exact pricing for your trip! 

Pricing estimates (per day cost):

  • Trekking Poles: $6 – $8
  • Sleeping Pads: $5
  • Backpacks: $10 (Kids, Men’s, and Women’s sizes available)
  • Tents (2-6 person options): $12

*Ultralight tents and backpacks available.

Stop by any of our locations for your rental equipment!


Ready to be outdoors more this year? We have the camping + outdoor gear you need to get you on the trails!  We want everyone to enjoy the outdoors, and we work to build loyalty one connection at a time. Visit one of our stores or take advantage of our shipping or curbside pickup! #BeOutdoors

10 Winter Camping Hacks for the Eco-Conscious Camper

Winter camping can be a pain in the butt, but it doesn’t have to be a pain on the Earth. Here are 10 sustainable hacks to help you stay warm, comfortable and eco-friendly on your next winter camping trip.


1. Use a Dry shampoo.

When it comes to conserving water, staying warm and staying fresh in the wilderness, dry shampoo is your new best friend. We recommend Mellow Oak’s “North Loop” Organic Dry Shampoo, which comes in a recyclable paper tube and is made with all-natural ingredients. It’s a quick, easy and eco-friendly way to freshen up your hair. The last thing you need is wet hair when it’s cold out.

Mellow Oak Organic Dry Shampoo


2. Insulate your tent with a reflective blanket or tarp.

Reflective blankets or tarps can be used to keep the heat in and reduce the need for additional heating sources such as propane heaters. Don’t forget to put the reflective side inwards for warmth so your heat goes back to you.


3.Use a camping stove that runs on renewable fuel sources.

Instead of using propane or gasoline, find  a camping stove that runs on wood, twigs, or pellets. Not only are these options more sustainable, but you can impress your friends and cook over an open flame. One of our favorite products is BioLite’s CampStove 2+. It is a portable campfire that can cook your meals and charge your gear, all at the same time. It uses combustion technology to turn fire into electricity, so you can leave the gas canisters behind and use the sticks and twigs around you instead.


4. Invest in a camping mat made from sustainable materials.

Camping mats provide insulation between you and the ground. This can help to keep you warm and comfortable, especially in colder weather. Look for a camping mat made from recycled materials, natural rubber or cork, which will provide insulation and comfort while reducing the use of synthetic materials that are harmful to the environment. 


5. Find a warming muscle salve.

When it comes to camping in winter, taking care of your muscles and skin is just as important as the clothes you put on. One product that can aid in this is a CBD muscle salve. We like  Mellow Oak’s “Hike Recovery” CBD Muscle Salve, made with sustainably-sourced, organic ingredients with packaging made from post-consumer recycled materials. This eco-friendly choice is a great option to help take care of yourself during  your trip.

Mellow Oak Hike Recovery CBD Muscle Cream


6.Use a solar-powered flashlight or lantern to conserve energy and reduce waste.

Winter camping often means shorter days and longer nights, so having a reliable source of light is essential. Solar-powered flashlights or lanterns are a sustainable alternative to traditional battery-powered options as they use the sun’s energy to charge and don’t require frequent battery replacement.


7. Use a water bottle to keep warm.

Instead of disposable hand warmers, bring a reusable hot water bottle or hand warmer filled with hot water. These options will be more sustainable, and you can refill them with hot water as needed. A lightweight option we recommend is the 32 oz. Alabama Outdoors Nalgene Wide Mouth Bottle. And don’t worry, Nalgene bottles are BPA free so you are safe to use that water the next day.


8. Make your own fire starters with household materials.

Starting fires in the cold, and often wet, winter months, can be a major challenge. Fortunately, household items like butter wrappers, cotton balls, old birthday candles, sawdust, egg cartons, and dryer lint can be saved from the landfill and turned into effective kindling. For example, it’s easy and virtually free to make fire starters by melting down old birthday candle stubs and pouring the wax over dryer lint or sawdust inside the cup from a paper egg carton. Get creative with what you can find around the house and experiment. Just take care to only use clean burning and naturally derived materials that won’t release noxious smoke. Trying to keep that fire going? Check out our favorite gadget, the Pocket Bellow Collapsible Tool, and be sure to always follow local fire ordnances and safety rules!


9. Stay warm and dry with wool clothing.

Natural fiber clothing doesn’t shed microplastic fibers into the environment, but cotton doesn’t wick moisture away from the skin when wet, which can cause discomfort, or in the extreme, can be life threatening in very cold, wet weather. Wool fabric moves moisture away from skin and maintains warmth even when wet, making it perfect as a winter base layer. Shop wool base layers here.


10. For outer layers, choose PFC-free rain/snow gear.

One of the biggest environmental concerns with modern rain protection is the use of perfluorochemicals (PFCs) as a durable water repellent (DWR) finish. These toxic compounds, also known as “forever chemicals,” do not readily break down in the environment, but are found in many common products and will wear off your jacket, sleeping bag, tent, etc., with use, polluting the environment. Waxed canvas jackets can be a good alternative to synthetic materials, but may not always be the most practical option. More outdoor companies are introducing PFC-free gear all the time. 


By following these sustainable camping hacks, you’ll be able to enjoy your winter camping experience without sacrificing your commitment to the environment. Happy camping!


Written by: Mike Black, co-founder of Mellow Oak. Mellow Oak is a local Birmingham business focused on high-quality wellness products with sustainable, all-natural ingredients, sourced from trusted producers while minimizing waste. Check them out and give them a follow!


Ready to be outdoors more this year? We have the camping + outdoor gear you need to get you on the trails!  We want everyone to enjoy the outdoors, and we work to build loyalty one connection at a time. Visit one of our stores or take advantage of our shipping or curbside pickup! #BeOutdoors


How to Plan a Ski Trip With Kids

Maybe you grew up on the slopes. Maybe you discovered your love for skiing as an adult. But few things are as special as being able to share your love for skiing with your family.

The fresh mountain air, blue skies, and exhilarating feeling of actually skiing down the bunny slope: Who wouldn’t want to experience that? However, any weathered parent will tell you that every successful family trip starts with a good plan.

That is especially true when you are transporting your children to a high-altitude setting with below-freezing temperatures to learn a sport with strange boots and lots of layers. But the challenge can be worth the trouble if you keep in mind a few tips.

Keep everyone comfortable

If you are bringing little ones to the slopes for the first time, it’s critical that you ensure everyone stays comfortable, ie. warm, but not too warm, and dry. That’s not easy when you are outside for hours at a time on a mountain covered in snow. That’s why layering is so important. Be sure everyone has a base layer, a mid-layer, and a waterproof outer layer along with appropriate socks, gloves, and headwear.

If you are unsure if you have the right clothing, check with a trusted expert at a local outdoor recreation and apparel store like Alabama Outdoors before you leave for your trip. Last-minute clothing purchases in a resort town can be pretty pricey, and you want everyone to feel prepared the first time you head to the lodge.

Pick the right ski resort

Any vacation with kids can be tricky, especially when it comes to making sure everyone has fun without draining your bank account. Skiing can get expensive, especially if you are outfitting an entire family in the clothes and equipment, getting lessons for the newbies, and buying passes to the mountain.
And, if, despite your best efforts, one or two of your crew doesn’t enjoy skiing, you need to be staying at a resort or in a town offering fun activities off the slopes.

That’s why it pays off to do your research when it comes to resorts. For instance, some offer deals where kids can ski for free. TravelingMom.com has compiled a state-by-state list of resorts offering children-ski-free deals. Travel+Leisure Magazine also has compiled a list of family-friendly resorts.

Get your head right

A ski vacation can be a logistical nightmare with or without kids. Weather delays, illnesses, the potential for injuries, and all the clothes that have to be managed make it challenging even for adults.

That’s why it’s important to remind yourself that children may not make it as long as you would on the mountain. You will likely have to be more flexible in terms of when you go skiing (not at peak times) when you leave, and how much time you budget for getting your gear and getting from Point A to Point B. Finally, invest in a day of lessons through the ski school. Even if you are a black-diamond skier, you may not be the best person to teach your child. Chances are your children will learn more and behave better for a ski instructor.

A well-planned family ski trip can help create wonderful family memories and, hopefully, launch a family tradition that allows you to #BeOutdoors with the ones you treasure the most.


Planning a ski trip this season? Find what you need for your ski trip or winter adventures here! We want everyone to enjoy the outdoors, and we work to build loyalty one connection at a time. Visit one of our stores or take advantage of our shipping or in-store pickup! #BeOutdoors

Winter camping is a great way to see more nature and fewer people

Winter camping is a great way to see more nature and fewer people

The trails are devoid of human life, animals wander freely through the woods, and snow falls soundlessly on the treetops—it’s wintertime in the great outdoors. But despite the sparkling vistas, uncrowded trails, and the beauty nature offers to hikers in this time of the year, many never experience the wonder that the fourth season offers because of one tiny detail: the cold.

What most people don’t know is that a little know-how, the right equipment, and simply wearing multiple layers can help with the challenges of camping in the winter. With some planning, you’ll easily stave off frostbite, sleepless nights, and never-ending shivers, all while enjoying beautiful natural sights.

Don’t fear the cold

“Winter is one of the best times to be outdoors,” says Tayson Whittaker, winter camping enthusiast, and founder of outdoor gear and clothing company Outdoor Vitals. He cites seclusion, wildlife activity, and the peace and quiet of a landscape covered in snow as some of the reasons you’re just as likely to find him setting up camp in the snow as next to a field of spring flowers.

To him, it’s easy to explain why more people aren’t outside, experiencing the magic of seeing a herd of elk feeding amid freshly fallen snow: “It’s plain and simple fear—fear of being cold, of doing something they haven’t, of the unknown, of the hypotheticals,” Whittaker says.

But to be fair, there are plenty of hypotheticals regarding cold that would deter someone from camping in the middle of winter: frostbitten extremities, feet that won’t thaw, a chill that never abates, nights spent awake and shivering in a frosty tent, wet gear, and worst of all, hypothermia. Whittaker has personally suffered through most of these situations, but he says preparation can make it easy for anybody to avoid them.

Choose the right gear

A sturdy tent is important if you don't want to wake up buried in snow.
Popular Science

While warm temperatures rarely require hefty sleeping bags or insulated sleeping pads, winter temps demand you be familiar with your gear and what it can handle. But fear not—this doesn’t necessarily mean you have to spend a lot of money on new equipment. “You don’t have to reinvent the wheel,” Whittaker says. “A lot of times, you can take the gear you have and stretch it to work in that forth season.”

Start with a warm enough sleeping bag for the temperatures you anticipate. (Keep in mind men’s and women’s bags are rated differently, since women tend to sleep colder.) If you don’t think your current bag will do, you still might not have to shell out several hundred dollars for a new one—you can often spend less than $50 on a sleeping bag liner or a backpacking quilt and layer the bags.

But that’s just half the battle. A sleeping pad designed for winter is what separates you from the frozen ground, so it’s also of the utmost importance. Choose an insulated variety with an R-value (an insulation rating used from everything to sleeping pads to the fiberglass you stuff in your walls) of at least four, or simply stack an inflatable pad on top of a closed-cell foam pad for extra insulation from below.

Next, mind your tent: “Make sure you have a shelter that can handle a bit of a snow load,” Whittaker says, warning that if it can’t, the entire structure could cave. Four-season tents are designed to handle harsh winter conditions and the extra weight of snow, but they are expensive and less commonly stocked at your local outdoor retailer. A three-season shelter will do the job, too, as long as it’s freestanding. But Whittaker recommends avoiding single-wall tents or semi-freestanding tents that don’t have sturdy frames, since they are more likely to bow and collapse under a few inches of build-up.

As for boots, opt for an insulated pair. If they have removable linings, keep them in your sleeping bag at night so you don’t have to put your feet in cold boots in the morning. You can also keep your boots in a zip-top bag inside your sleeping bag to prevent them from freezing in extra cold temperatures.

Keep everything dry

No matter how big the fire, forget about your wet clothes until you go back to civilization.
Popular Science

Wet gear is often the first sign that trouble is on the horizon. That’s because if your jacket, sleeping bag, or boots get wet in the winter, they won’t dry out as quickly as they would in warmer weather. In fact, if temperatures are below 32 degrees Fahrenheit, they’ll freeze before they dry.

That’s why keeping everything as dry as possible is crucial. And that goes for clothing and gear alike. These are the maxims you need to abide by:

  • Keep tents, clothing and sleeping bags in waterproof stuff-sacks inside your backpack.
  • Don waterproof gloves and keep a spare pair handy in case they get soggy.
  • Wear waterproof boots and gaiters to keep the snow from soaking your socks and always carry several extra pairs.
  • Be particularly careful with the clothes you sleep in. A warm base layer and a dry pair of socks are vital when it’s time to turn in for the night. Don’t even try sleeping in the same damp clothes you hiked in—you’ll be in for a long, miserable night.

Layer it up

“Have a layering strategy,” Whittaker says about clothing. Don’t just throw on a long-sleeve shirt and a jacket—you’ll have no wiggle room if you get too cold or too warm. Instead, start with a warm synthetic base layer, add a mid-layer such as a fleece, wool shirt, or mid-weight jacket, then top it all off with a waterproof layer. Make sure you remove layers when you start to sweat and add them back on when you begin to cool down.

But whatever you do, avoid cotton. Once the material gets wet, it doesn’t dry easily, which means that unless you want to suffer from hypothermia, you won’t be able to wear it again.

Whittaker also suggests ditching some of your down when you’re winter camping—if it gets wet, it loses its insulating power. Instead, opt for synthetic insulation in jackets and other clothing layers. Whittaker does make a case for down socks which, according to him, are the only down garment he wears in the winter. He recommends them for use inside your tent and to keep your feet warm overnight.

As for your hands, treat them like you do the rest of your body, and dress them with layers. Start with a snug synthetic base layer such fleece or nylon, which will wick moisture, provide warmth, and allow dexterity when it’s time to light your stove or set up your tent. Then layer with a waterproof glove or mitten, adding one additional layer in between for extra warmth if you feel you need it.

For your feet, start with a synthetic layer, then a thick pair of wool or synthetic socks. Make sure your boots are big enough to accommodate these layers (one size larger than what you would normally wear should do) or circulation may be restricted, which will not only be uncomfortable, but will keep you feeling cold.

Tips for winter camping

Sleeping with your phone is not always the best idea, but consider winter camping the one exception.
Popular Science

One of the upsides to camping in the snow is that you won’t have to bring as much water as you would in warmer weather. You can use clean, fallen snow and melt it in a pot over the fire until it comes to a boil—this will kill viruses and bacteria and make it safe for drinking or cooking.

Speaking of snow, stomp down on and compress the snow where you plan to place your tent so you start with a flat surface and don’t sink throughout the night. Don’t forget the area around your vestibule, either—it’ll give you a place to stash your bag and climb out of your tent without tumbling into deep snow.

If you’re worried about fingers and toes getting too cold, bring along single-use hand- and foot-warmers, or fill a water bottle with hot water before bed. Place it in your sleeping bag to help warm you up at night, but make sure the lid is on tight so you avoid getting burned or soaking your gear.

But you’re not the only one who has to keep warm: make sure your batteries, GPS, cell phone, and other devices don’t freeze, since they won’t hold a charge if they’re cold. During the day, keep them near your body in an interior jacket pocket, and store them in your sleeping bag at night. Most bags even have a special zipper pocket near your chest for this purpose.

Get out there

Don’t let winter weather keep you indoors. Instead, protect your stuff from the damp, choose gear wisely, layer up, and don’t let the thermometer readings frighten you out of enjoying the season.

“If you can backpack in the other seasons, you can backpack in the winter,” Whittaker encourages. “It’s not as scary as you think.”


Written by Alisha McDarris for Popular Science and legally licensed through the Matcha publisher network. Please direct all licensing questions to legal@getmatcha.com.

Wanting to get out and explore? Find what you need for your next winter adventure hereWe want everyone to enjoy the outdoors, and we work to build loyalty one connection at a time. Visit one of our stores or take advantage of our shipping or curbside pickup! #BeOutdoorsrs

Featured image provided by Popular Science

Insider Tips for Your First Backpacking Trip

Looking to get back outdoors and celebrate National Camping Month? We have plenty of places to camp and explore in Alabama from car camping to primitive to back country trips. If you are ready to step up your explorer skills and go on a backpacking trip, read below for all of our insider tips to make your trip successful and fun! Adventure on!


From the rocky outcrops of the Talladega National Forest to the waterfalls of the Sipsey Wilderness, Alabama is home to many excellent backpacking trails that practically beg for an overnight adventure.

If you’ve only done day hikes, however, a longer overnight trek through the backcountry can seem slightly intimidating. But with a little research and planning, your first backpacking trip can be an amazing experience that paves the way for future adventures.

The rewards are well worth the planning and effort. Deep in the woods, you’ll discover the kind of scenery, solitude, and natural wonders that many people never experience. At night, beneath the stars, far away from civilization and crowds, you’ll savor a sense of calm that’s hard to find in today’s fast-paced, tech-saturated world.

To help you launch your first outing, we’ve compiled 10 insider tips to help you plan your route, choose the right gear, and travel comfortably and safely in the backcountry. Follow these guidelines, and your first backpacking trip will likely be the first of many.

1. Go with an experienced backpacker.

62JKdsJKZUy0ikO6uQ6IeM
An experienced backpacker can provide invaluable help for beginners. Michael Hicks

If you have friends who are experienced backpackers, it’s a great opportunity to tap into their knowledge for your first trip. It’s a win-win for everyone: Your friend will likely be flattered, and you can soak up tons of outdoors intel. A trail veteran can share insider tips like what to pack and how to pitch a tent, while helping you avoid rookie mistakes along the way. (Some of us learned the hard way that you can melt your hiking boots by drying them too close to the campfire.)

Most of all, an experienced buddy provides a safety net as you learn the ropes. For example, if you’re not sure about your ability to navigate in the wilderness, you can lean on you partner’s experience and treat your first trip as a learning opportunity.

2. Try an overnighter first.

8ImZfMMPvOQqIigU4Ksai
Keep things simple and stay closer to home for your first backpacking trip. Michael Hicks

Long backpacking trips involve more logistics, more food, heavier packs, and more time away from creature comforts. For all of these reasons, your first backpacking trip will be a more enjoyable experience if you camp just one night (max two). A shorter trip lets you break in gear—for example, if you discover that your boots cause blisters or your pack doesn’t fit correctly—with an easy exit if you need it. Choosing a destination at a state park like Oak Mountain allows you to enjoy rugged surroundings with easy access to facilities and civilization should things go sideways.

3. Travel a modest distance.

2RWr4VCuXC8oMMsMcsYq8O
As you get the swing of things, opt for shorter distances—no more than 10 miles—for your first few trips. Michael Hicks

Beginner backpackers commonly overestimate how many miles they can cover comfortably in a day. Most of us don’t carry 30 or 40 pounds on our backs regularly, and we’re certainly not used to hauling that weight up and down hills. To avoid exhaustion and sore muscles, try an overnighter where you travel a total of 8 to 10 miles or less. This will allow you to hike at a comfortable pace and reach camp before sunset. Keep in mind that you will probably spend more time than expected packing for your trip and hitting the road, so you might get to the trailhead later than expected. To account for this likely scenario, you shouldn’t plan to do a ton of miles your first day on the trail.

4. Choose a convenient hiking route.

5LTYEJcmvmYCWqo42qEOii
Loop hikes and out-and-back routes are simpler to plan. Michael Hicks

For your first trip, it’s easier to do a loop hike or an out-and-back trip where you begin and end at the same trailhead. If you plan a point-to-point trip, you’ll need to place cars at each end of the route, so hit the road early and allow extra time for this task.

5. Do your gear homework.

6TVJkW7POwqsWqeSEoWa04
Doing some recon ahead of time about brands and gear will save plenty of hassles and money. Michael Pollak

Bone up on gear basics as you plan your trip (a few recommended online reads: A Beginner’s Guide to Camping Gear and How to Choose the Right Backpack). As you do your research, create a packing list and note the items you need to purchase. Before you buy anything, get an idea of the options available and what will suit your journey. Do you need a super-warm sleeping bag rated for freezing temperatures, or a 50-degree bag for milder weather? If you need advice on gear, outdoor specialty stores employ knowledgeable team members!

6. Rent gear to save money.

High-quality backpacking gear can be expensive, and you might not have the budget to buy everything you need for an initial trip. If you travel with an experienced backpacker, you might be able to borrow gear. Also, outdoor specialty stores and online services allow you to rent tents, backpacks, sleeping bags, stoves, and other necessities. As you gain backpacking experience, you’ll have a better idea of the specific products you’ll want to purchase. (And if you ultimately decide that you’d rather stick to day trips, you won’t have shelled out too much money.)

7. Invest in good footwear.

Nothing will ruin a trip faster than shoes or boots that fit poorly or fall apart, so invest in high-quality footwear. If you plan to trek in the rain or cross lots of streams in cool or cold conditions, consider buying waterproof boots. But if you plan to hike when it’s warm and humid (pretty much a given Alabama for most of the year), keep in mind that waterproof footwear traps warm air and moisture around your feet that can cause blisters. If you carry a load of 30 pounds or less, you can usually wear a low-cut shoes for hiking and traveling. Packing more than 30 pounds usually requires a full boot that will offer the rigidity and midsole structure needed to bear a heavy load. Whether you get shoes or boots, wear them several days beforehand to check the fit and break them in before you hit the trail.

8. Learn how to layer wisely.

The key to staying comfortable on the trail is to regulate your body temperature so that you’re not too cold or too hot for long periods. In warm weather, you can backpack in shorts and a short-sleeve shirt made of synthetic material. For early spring, fall, and winter seasons, the trick is to dress in layers, beginning with thin top and bottom base layer pieces that include synthetic fabrics or wool. Then, add light or mid-weight tops and bottoms over the base layers, and pack an insulated jacket for colder conditions. The final layer includes your waterproof jacket and pants. Because we lose much of our heat from our head and hands, you should also pack gloves and a hat made of synthetic material or wool.

9. Keep the campfire menu simple.

It’s possible that you’ll arrive at camp tired and in no mood to fuss over a complicated meal. So, consider packing foods that are easy to prepare, such as pre-packaged, freeze-dried meals that only requires you to add boiling water. Or, you can visit your local supermarket to buy soup packets as well as foil packets of tuna, salmon or chicken. Just try to avoid canned soups or other foods that include lots of liquid, because these items are heavy. Also, you’re going to burn plenty of calories while backpacking, so bring plenty of snacks to munch on as you walk.

10. Be ready when nature calls.

If you’ve never gone to the restroom in the woods (and we don’t mean using an outhouse), it can be an intimidating experience. But the procedure is pretty simple, and you can find details by visiting the Leave No Trace website. Just remember that it’s important to bury your waste, pack out your used toilet paper, and clean your hands with wipes or sanitizer. You’ll need a toilet kit, too: Include a trowel for digging a cat hole, toilet paper (plus baby wipes if you’d like), hand sanitizer, a large Ziploc-style freezer bag to hold toilet paper and other toilet supplies, and a smaller bag to hold used toilet paper. It’s not the most pleasant aspect of an overnight adventure in the backcountry, but—as with everything else with your first backpacking trip—soon enough it will be second nature.


Ready to be outdoors this Summer to celebrate National Camping Month? We have the camping + outdoor gear you need to get you on the trails! Not quite ready to commit to all of the gear? We get it! Click here to learn more about our Rental Program for your next trip! We want everyone to enjoy the outdoors, and we work to build loyalty one connection at a time. Visit one of our stores or take advantage of our shipping or curbside pickup! #BeOutdoors


Written by Marcus Woolf for RootsRated in partnership with Blue Cross Blue Shield of AL and legally licensed through the Matcha publisher network. Please direct all licensing questions to legal@getmatcha.com.

5 Tips to Get the Most Out of Your First Ski Trip

At Alabama Outdoors, we love skiing! While it may not be as popular here as it is up north, we’ve got you covered with essential ski gear and all the insider info. So if it’s your first time heading to a slope, check out our top 5 tips to enjoy your trip to the max!


Buy the right gear, rent the rest

Skiing takes a lot of gear. Between the skis, boots, and poles, there are also jackets, pants, helmets, goggles, beanies, socks, and more. Don’t sweat trying to buy everything; renting is essential. The nice part about ski gear is that you can wear some styles daily, so consider buying versatile ski gear. Look for beanies that you’d rock in the fall, a triclimate jacket with zip-in liner, and wool base layers. Triclimates can go from a thick winter jacket to a lightweight rain jacket or a warm midlayer in seconds. And wool baselayers are perfect for winter camping down south. So you can get the most out of your gear! Here is what you (need) to buy, and what you should definitely rent:

Rent:

  • Skis/ snowboard
  • Poles
  • Boots
  • Helmet

Buy:

  • Goggles
  • Ski gloves
  • Ski apparel & other accessories

Layer, layer, layer

Versatile gear is great, but just as important is layering. The key to staying comfortable on the slopes is wearing multiple layers. We go over it more in detail on this blog How To Layer Clothing, but the basics are simple. First, you want a moisture-wicking base layer made of wool or polyester, these will be your best friend all day. Then, you need a midlayer that’s thick enough to keep you warm but thin enough to breathe, like a fleece or hoodie. And finally, you want a waterproof shell layer that locks out moisture and vents heat. You can check out our favorite layering pieces here.


Protect your skin

One of the easiest mistakes is not taking care of your skin. Whether it’s chafing, sweating, exposure, or getting a sunburn, skincare is crucial for a fun ski trip. The best way to avoid skin issues is quality base layers. Base layers should wick moisture, regulate temperature, and reduce friction to prevent blisters. Cover your face with a thin, breathable neck gaiter or ski mask on the extra-cold and windy days. And make sure it’s adjustable so you can uncover your face and breath easily. Always make sure to apply sunscreen- even if it’s cold! Being at a higher elevation, you will get sunburn much quicker, so keep that in mind and remember to reapply and keep your skin and yourself hydrated! Another usually underrated accessory is socks. Don’t grab your old cotton socks from your dresser and think- “ah, these will work”. Find a ski-style sock that reaches up to your knees with minimal seams and is made of moisture-wicking materials, like your base layers. Check out our favorite ski accessories here!


Pack essentials plus extras

Snacks, water, sunscreen, lotion, and extra accessories like a beanie and buff can make or break your trip. If you’re staying far from the slope these are great extras to have on hand. An extra beanie and buff are perfect for swapping out midday if they’re gotten wet or icy. It’s good to swap out beanies and face masks to avoid sweat building up and keeping you cold.


Prepare to relax & have fun

Pack for some serious relaxation too. Not only is the ski slope great for shredding, but there are lots of fun ways to relax there, too. Whether it’s curled up by a fire, going for a winter walk, or spending time with a warm cup of coffee on a chilly porch enjoying the view, you’ll need extra clothes for lounging. That’s why we love the Free Fly Bamboo Fleece Hoodies


We hope this has helped you prepare for a great time in the wintery outdoors on the slopes! If it’s your first time or you only get to go so often, just remember to listen to your body and not overdo it. Relax and have fun and be sure to plan ahead to make this trip an all-around stellar time!


Planning a ski trip this season? Find what you need for your ski trip or winter adventures here! We want everyone to enjoy the outdoors, and we work to build loyalty one connection at a time. Visit one of our stores or take advantage of our shipping or curbside pickup! #BeOutdoors

7 Underrated Ways to Leave No Trace in the Outdoors

Everyone knows about packing out your trash, or what to do when nature calls in the wilderness. These are number one and number two (literally) in the leave-no-trace playbook for those of us who care about preserving outdoor spaces for future generations to enjoy.

Well, okay, apparently not everyone knows. We see trash (and pick it up) all the time, just like you do. We’re as baffled as you are when we see some yahoo flick a cigarette butt out the window of their car. Do some people simply not care? Further education is clearly needed.

For those of us in the know, though, minimizing our own impact goes beyond these two obvious line items. If you’re already doing the easy stuff, here are a few often-overlooked ways to tread lightly in the great outdoors.

1. Travel on durable surfaces.

6rNPvOme0o2MKS6WOkaCMy
Hiking the Ice Lakes Trail in Colorado’s San Juan National Forest. Paxson Woelber

This one should be easy: walk on the trail. Don’t cut switchbacks, which creates both erosion problems and ugly “social” trails. If you have to go off-trail, tread carefully; avoid fragile alpine flora or cryptobiotic desert soil. Of course, we all see evidence that many outdoor users aren’t doing this. We see all those social trails near lakes and campsites, and trampled vegetation near crags and scenic overlooks.

For all trail traffic, including mountain bikers: think about durable surfaces, and whether your boots or bike tires are leaving a discernible mark on the terrain. If you’re leaving ruts because of wet or freeze-thaw conditions, ride somewhere else; no matter how many slow-motion edits online seem to imply otherwise, it’s not okay to skid your tires and sling “brown pow” or pioneer off-trail alternate lines.

This goes for photographers, too, despite the temptation to stomp off-trail to that perfect vantage point. Sure, the adage may say: “Take nothing but photographs, leave nothing but footprints.” The photos are fine… but why leave footprints where you don’t have to?

2. Park your car on durable surfaces, too.

1HrW9fWpZCsMqSKQ64Y2sM
Parking at a snowy campground in Glacier National Park. D.Taylor in Idaho

What do you do when you arrive at a trailhead, and the parking lot is full? Do you just pull off the road wherever it’s convenient? In some environments this may be acceptable, but in many it’s not. If simply walking on cryptobiotic soil or alpine meadows has a negative impact on those surfaces, imagine what parking your 4Runner on them does. Additionally, if that parking lot is in a neighborhood, imagine how thrilled the neighbors will be if you’re parking on their lawn.

I’ve seen more than a few parking lots in National Parks absolutely overrun with cars parked all over sensitive terrain and their inhabitants absolutely trampling that terrain on the way in and out of those cars. We don’t think the answer is more parking and bigger parking lots, especially when the mission of the National Park Service is to protect and preserve these beautiful places; we think preservation includes an awareness of where you pilot your vehicle in the first place.

3. Respect permit limits, closures, and quotas.

4PPWO0766QkCuE8asGSUAs
View of Yosemite Falls from Glacier Point, Yosemite National Park. Mitchel

Speaking of full parking lots, some areas have chosen to counteract overuse by instituting lotteries, permit systems, and daily quotas. Sometimes that parking lot is full because, frankly, that’s how many visitors per day are a sustainable number without degrading the resource. Sometimes, areas are temporarily (or permanently) closed so they have a chance to recover. Some places, as we’ve noted in the past, are being loved to death.

We know it sucks when you arrive at the start of your day’s objective and it’s closed, or when you don’t win the lottery for that bucket-list trip, but the outdoors isn’t yours alone. We’re in this together, and we need to work together to protect the wild places we love. There are plenty of incredible places out there; be flexible with your plan, have a backup, and don’t fall into the trap of thinking that the only places worth visiting are on “10 best” lists and inside National Parks.

4. Avoid creating new campsites.

27nNxIBO7Wm8SMKOK6SGOq
Campsite on rocky cliff. ih

Well, aren’t we a buzzkill! While social media can seem like a competition to see who can pitch their tent in the most ridiculous place (we love @youdidnotsleepthere), existing campsites are usually there for a reason. Limiting the number of sites at a given location helps limit human impact to those designated places. If there are two camp spots at your favorite backcountry overlook, and you create a third, you’ve increased the visible impact by fifty percent!

You might be disappointed that the designated sites at that pristine alpine lake are two hundred feet from the water instead of two feet, but there’s a reason for it. You don’t have the right to overrule the land manager by making a new one! It’s easy to convince yourself “if I just put my tent here for this one night, I’m not really creating a campsite,” but you’ll leave signs of your visit; the visitor after you is likely to repeat your indiscretion, and the visitor after that, and what’s done cannot be undone.

5. Don’t build fire rings, and consider skipping the campfire entirely.

2LtxONTZvGSuCuUYgg8OG4
Utah camping without a fire. Zach Dischner

Look, we know that your Instagram shots are soooo much cooler with the glow of a campfire, and we all know a boutique, hand-painted hatchet is the ultimate accessory for the modern lumbersexual. We’ve also seen campsites surrounded by stumps where small trees used to be, the surviving tree stripped of every branch within arm’s reach.

It should go without saying that you should definitely skip the campfire if your region is experiencing a drought, you should respect any and all burn bans in place and, if you absolutely must have a fire, you must also make certain it’s completely out before moving camp. It almost sounds silly to type out, but every year major wildfires are started by careless campfire management. Roasting marshmallows over a canister stove may not be as sexy, but it’s also less likely to incinerate your favorite wilderness.

We recently published an article about campfire safety, but there are also some excellent articles about whether campfires are necessary at all (we recommendthis one). Think about it. Do you really need to have one?

6. Wash your gear, wash your kayak, and don’t transport firewood.

wsITAeBQmy02EGu8c624e
Packraft on the Anaktuvuk River, Alaska. Paxson Woelber

It’s important to understand that our impact on outdoor environments goes beyond what we can see, and beyond what is immediately apparent. A variety of pests and invasives—the hemlock woolly adelgid, the emerald ash borer, zebra mussels, water hyacinth—can be transported from watershed to watershed, and from forest to forest, sometimes with heartbreaking results.

We’re slowly watching our Eastern Hemlock trees die off, one by one, as the Adelgid spreads throughout the Appalachians. These ghost trees are solemn reminders that, sometimes, we leave behind more than footprints if we’re not careful.

You’ve probably seen signs at campsite kiosks and ranger stations instructing visitors to avoid transporting firewood and so forth. Not only should we be following these rules, we should make sure our fellow outdoor enthusiasts are aware of them, too.

7. No dams… and, seriously, stop stacking rocks!

2a4SGdZvdS0oCCie6auQwQ
Rock piles creekside along Middle Fork Trail, Washington. +Russ

Rock-stacking has become a major trend, and it absolutely has to stop. Cairns to mark a trail are fine, and are sometimes necessary, but we’re not talking about cairns. We’re talking about the bizarre proliferation of stacked rocks in certain parts of the world. No, you’re not enhancing the beauty of the natural environment. No, the wilderness doesn’t need improvement, especially if you consider ubiquitous signs of human meddling to be an improvement. It’s more of an eyesore.

As for dams, we see lots of river rocks being moved to create swimming holes, capture hot springs, and the like. This has a real impact on certain types of aquatic creatures, specifically the extremely interesting (and highly endangered) hellbender. Seriously, just leave the rocks where they are, and enjoy nature as it is. Scree slopes and rocky creek beds are not your personal Lego set.

Last Word

We’re not going to tell you exactly how to enjoy the outdoors; maybe you like to listen to Swedish death metal on your trail run; maybe you like to yell “wooo” at the end of a long downhill on your mountain bike, and more power to you on both counts.

Outside activity does, however, require an awareness of the world around you, and of the impact your visit has on it. We think that awareness should go beyond just burying toilet paper and carrying out your Snickers wrappers, and we hope you agree.

*We highly recommend some level of Leave No Trace training, not only for those new to the outdoors but for experienced outdoor enthusiasts. Learn more about Leave No Trace here. *


Wanting to get out and explore? Find what you need for your next adventure and explore the fresh. We want everyone to enjoy the outdoors, and we work to build loyalty one connection at a time. Visit one of our stores or take advantage of our shipping or curbside pickup! #BeOutdoors


Written by Jeff Bartlett for RootsRated in partnership with BCBS of Tennessee and legally licensed through the Matcha publisher network. Please direct all licensing questions to legal@getmatcha.com.

Featured image provided by Jeff Bartlett